Overview
Welcome to the Manager view!
The VMS application presents a useful, configurable tool that helps you complete tasks with ease. The simple design focus places a left navigation to click through when traveling to different parts of the application.
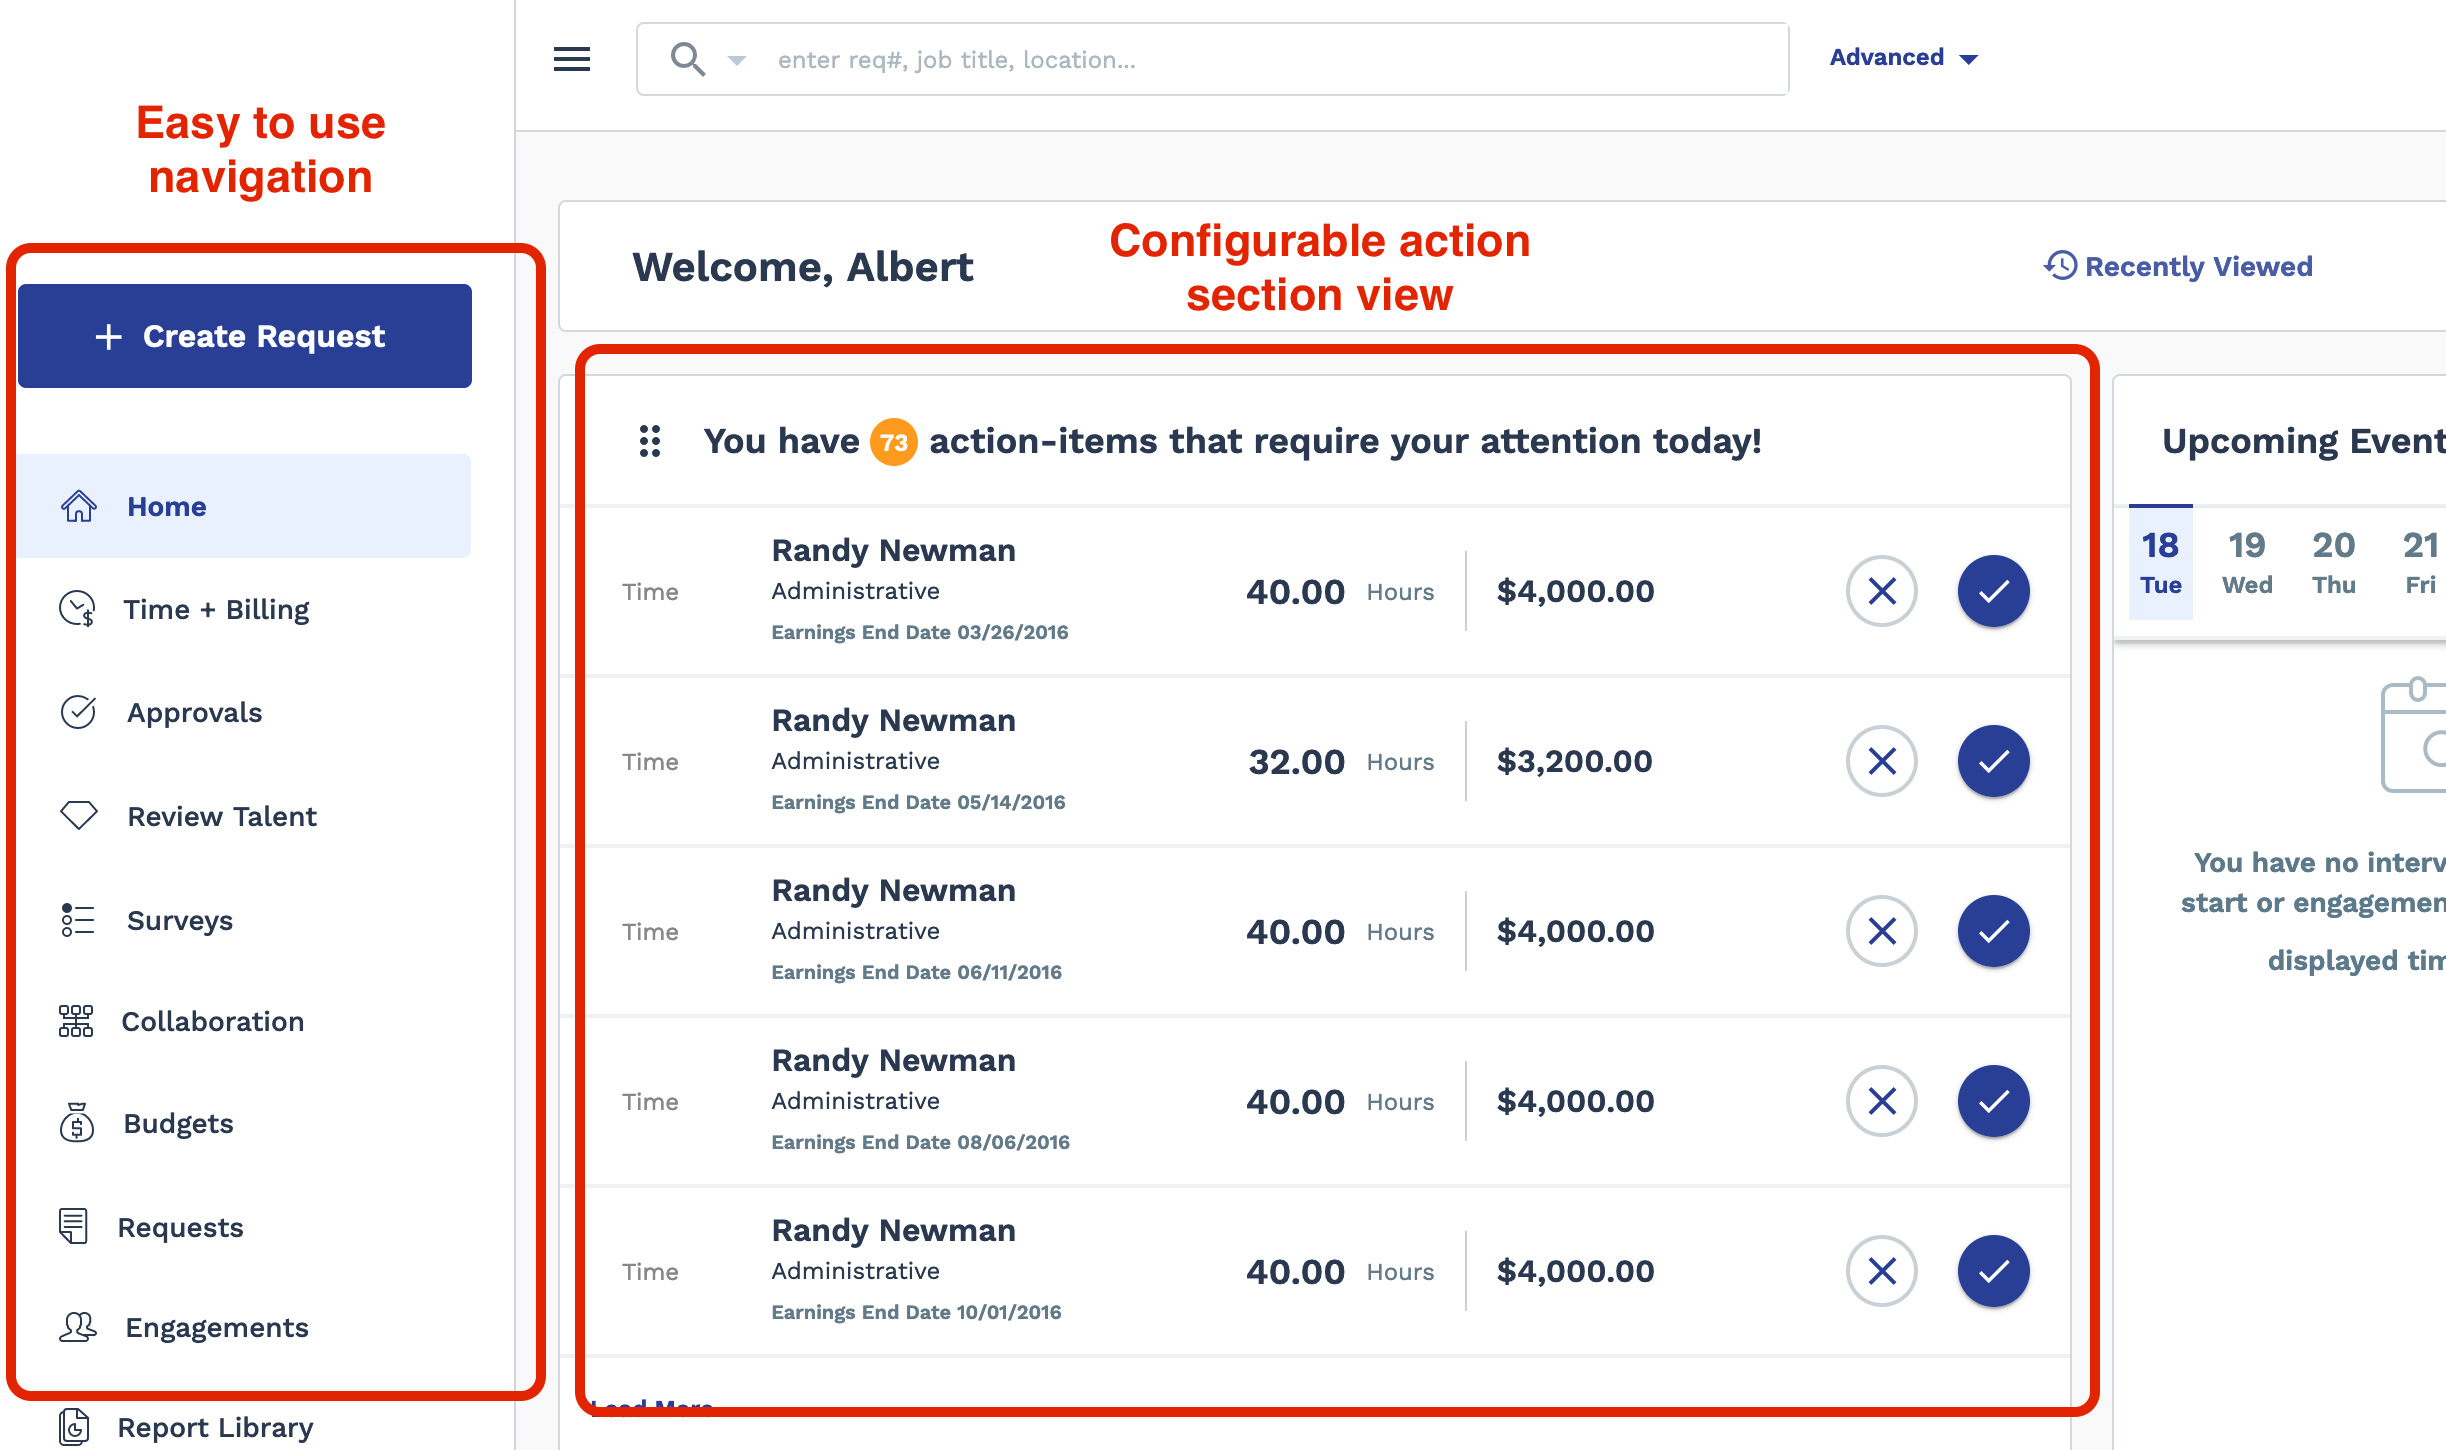
You can customize the view on some pages, only showing you what you need. You can also collapse the navigation if you do not need it.
Some examples of important activities while using the VMS are: creating requests for work, reviewing time and expenses submitted by workers/suppliers/service providers, reviewing candidates or quotes submitted for open work requests, and monitoring ongoing engagements to track efficiency and spend. For submitted time, the VMS allows you to quickly review details for each line item, such as hours worked in a day, and approve the time by clicking icons in the application. For candidates, each submitted resume appears with a status, allowing you to review details and set up an interview for a correct fit. All engagements where you are assigned as the manager appear in your view, giving you up to date access to status and important details, such as estimated end dates.
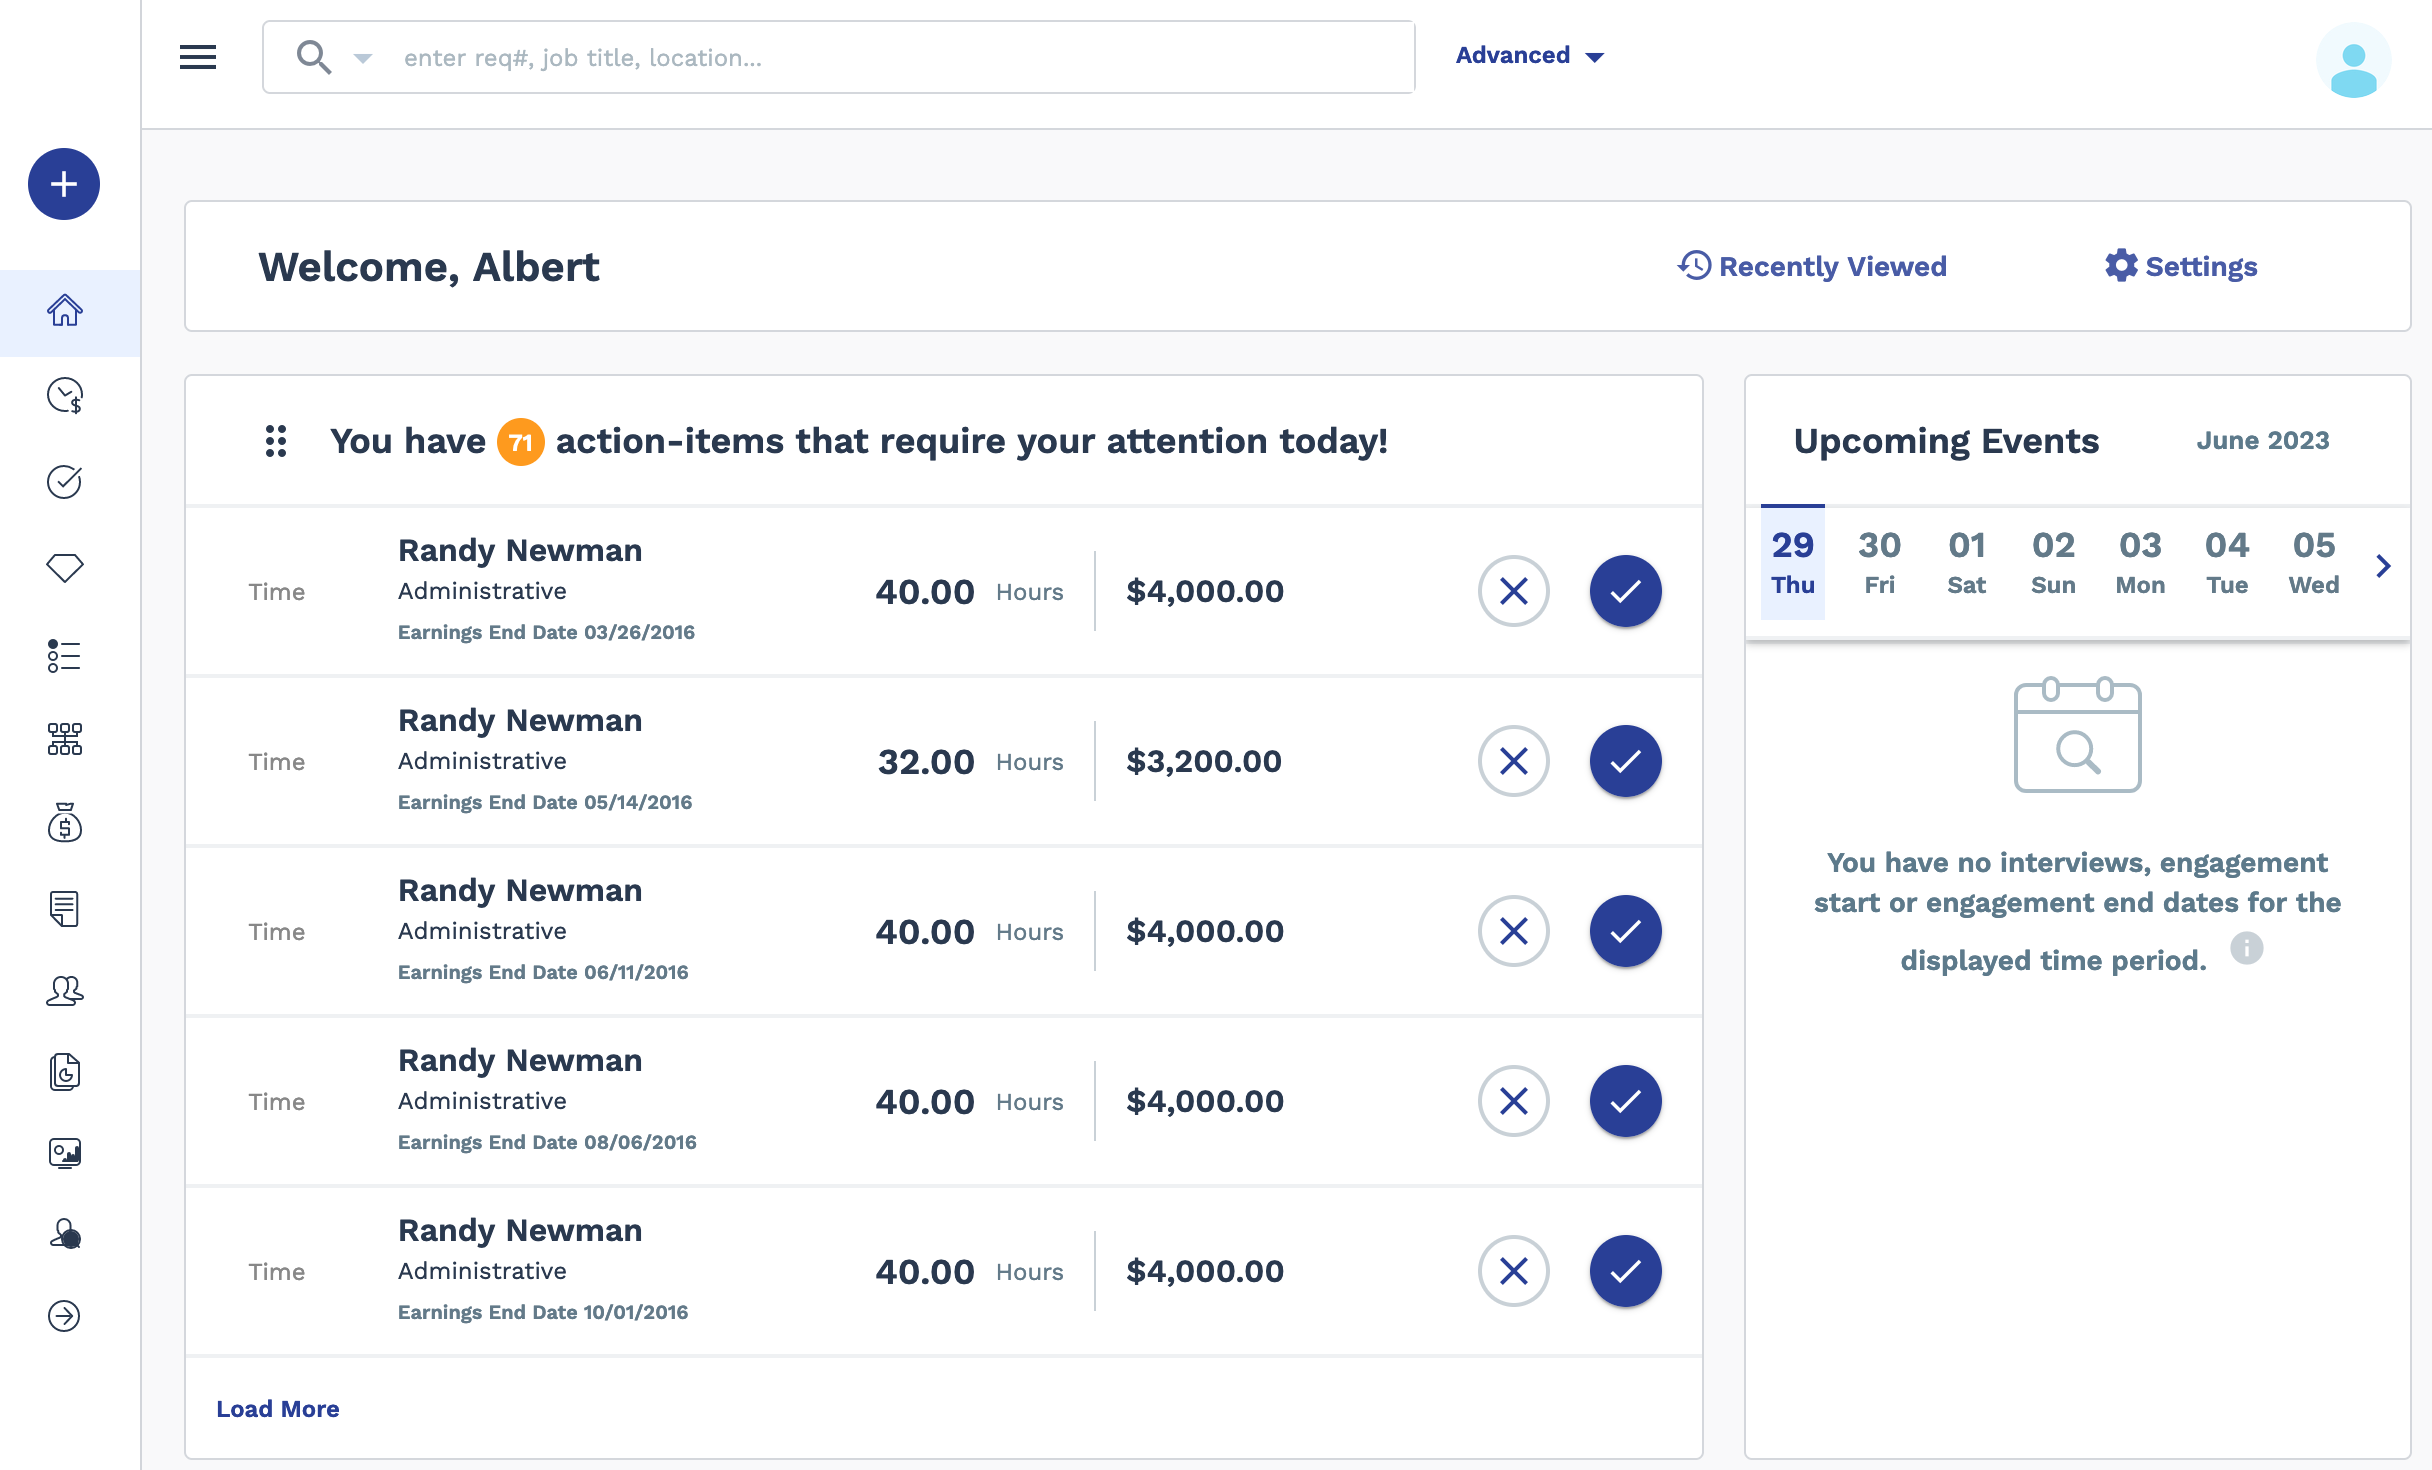
A consolidated view of all your important tasks and information is presented on the application's Home page.
A Review Talent section appears below the top sections. In this section, you view submitted candidates for requests, and quotes for project/SOW requests. Review the candidate's resume information by clicking the candidate's name. Their resume information submitted to the request display (along with the candidate's history). Controls on this page give you the option, dependent on your program's configuration, to set up interviews, and assign or reject the candidate.
The interview features in the application make scheduling interviews simple. If a
candidate meets requirements, clicking ![]() triggers the interview configuration page where you set up
the type (for example, one-on-one), format (for example, in person), and the contact
details. The interview details are included in email notifications that are generated
and sent out by the system (for example, when an interview is set up as well as
confirmed). Configurable integrations with the interview feature allow you to sync
interview times to a Google calendar, and integrate a third party video conferencing
tool (for example, Microsoft Teams) to generate links for video style interviews.
triggers the interview configuration page where you set up
the type (for example, one-on-one), format (for example, in person), and the contact
details. The interview details are included in email notifications that are generated
and sent out by the system (for example, when an interview is set up as well as
confirmed). Configurable integrations with the interview feature allow you to sync
interview times to a Google calendar, and integrate a third party video conferencing
tool (for example, Microsoft Teams) to generate links for video style interviews.
Below the Review Talent panel is the Requests panel where you can view open requests and project RFIs. Clicking the request name in the panel opens the details, giving you options to view activity and history for the request. If you have permission to change any details, you can modify and save from this view. More importantly, you can view important request workflow information such as status.
Lastly, in the Engagements panel , you view your ongoing work engagements. Clicking the engagement title opens the engagement details where you can view approvals, allocations (for example, cost centers associated with the engagement, and billing submitted at the engagement level).
See the below sections for more information about functions in the Manager view.
Approving Time and Billing
All time and billing that requires your approval can be viewed in the application. These items include changes to expense details as well. Each time can be approved or rejected from the Home page, or from the detail view.
The detail view displays two different things; timecards, which are a group of billings submitted for a designated time period, or individual billings, such as expenses (with or without receipts), project items, or adjustments to previously submitted billing.
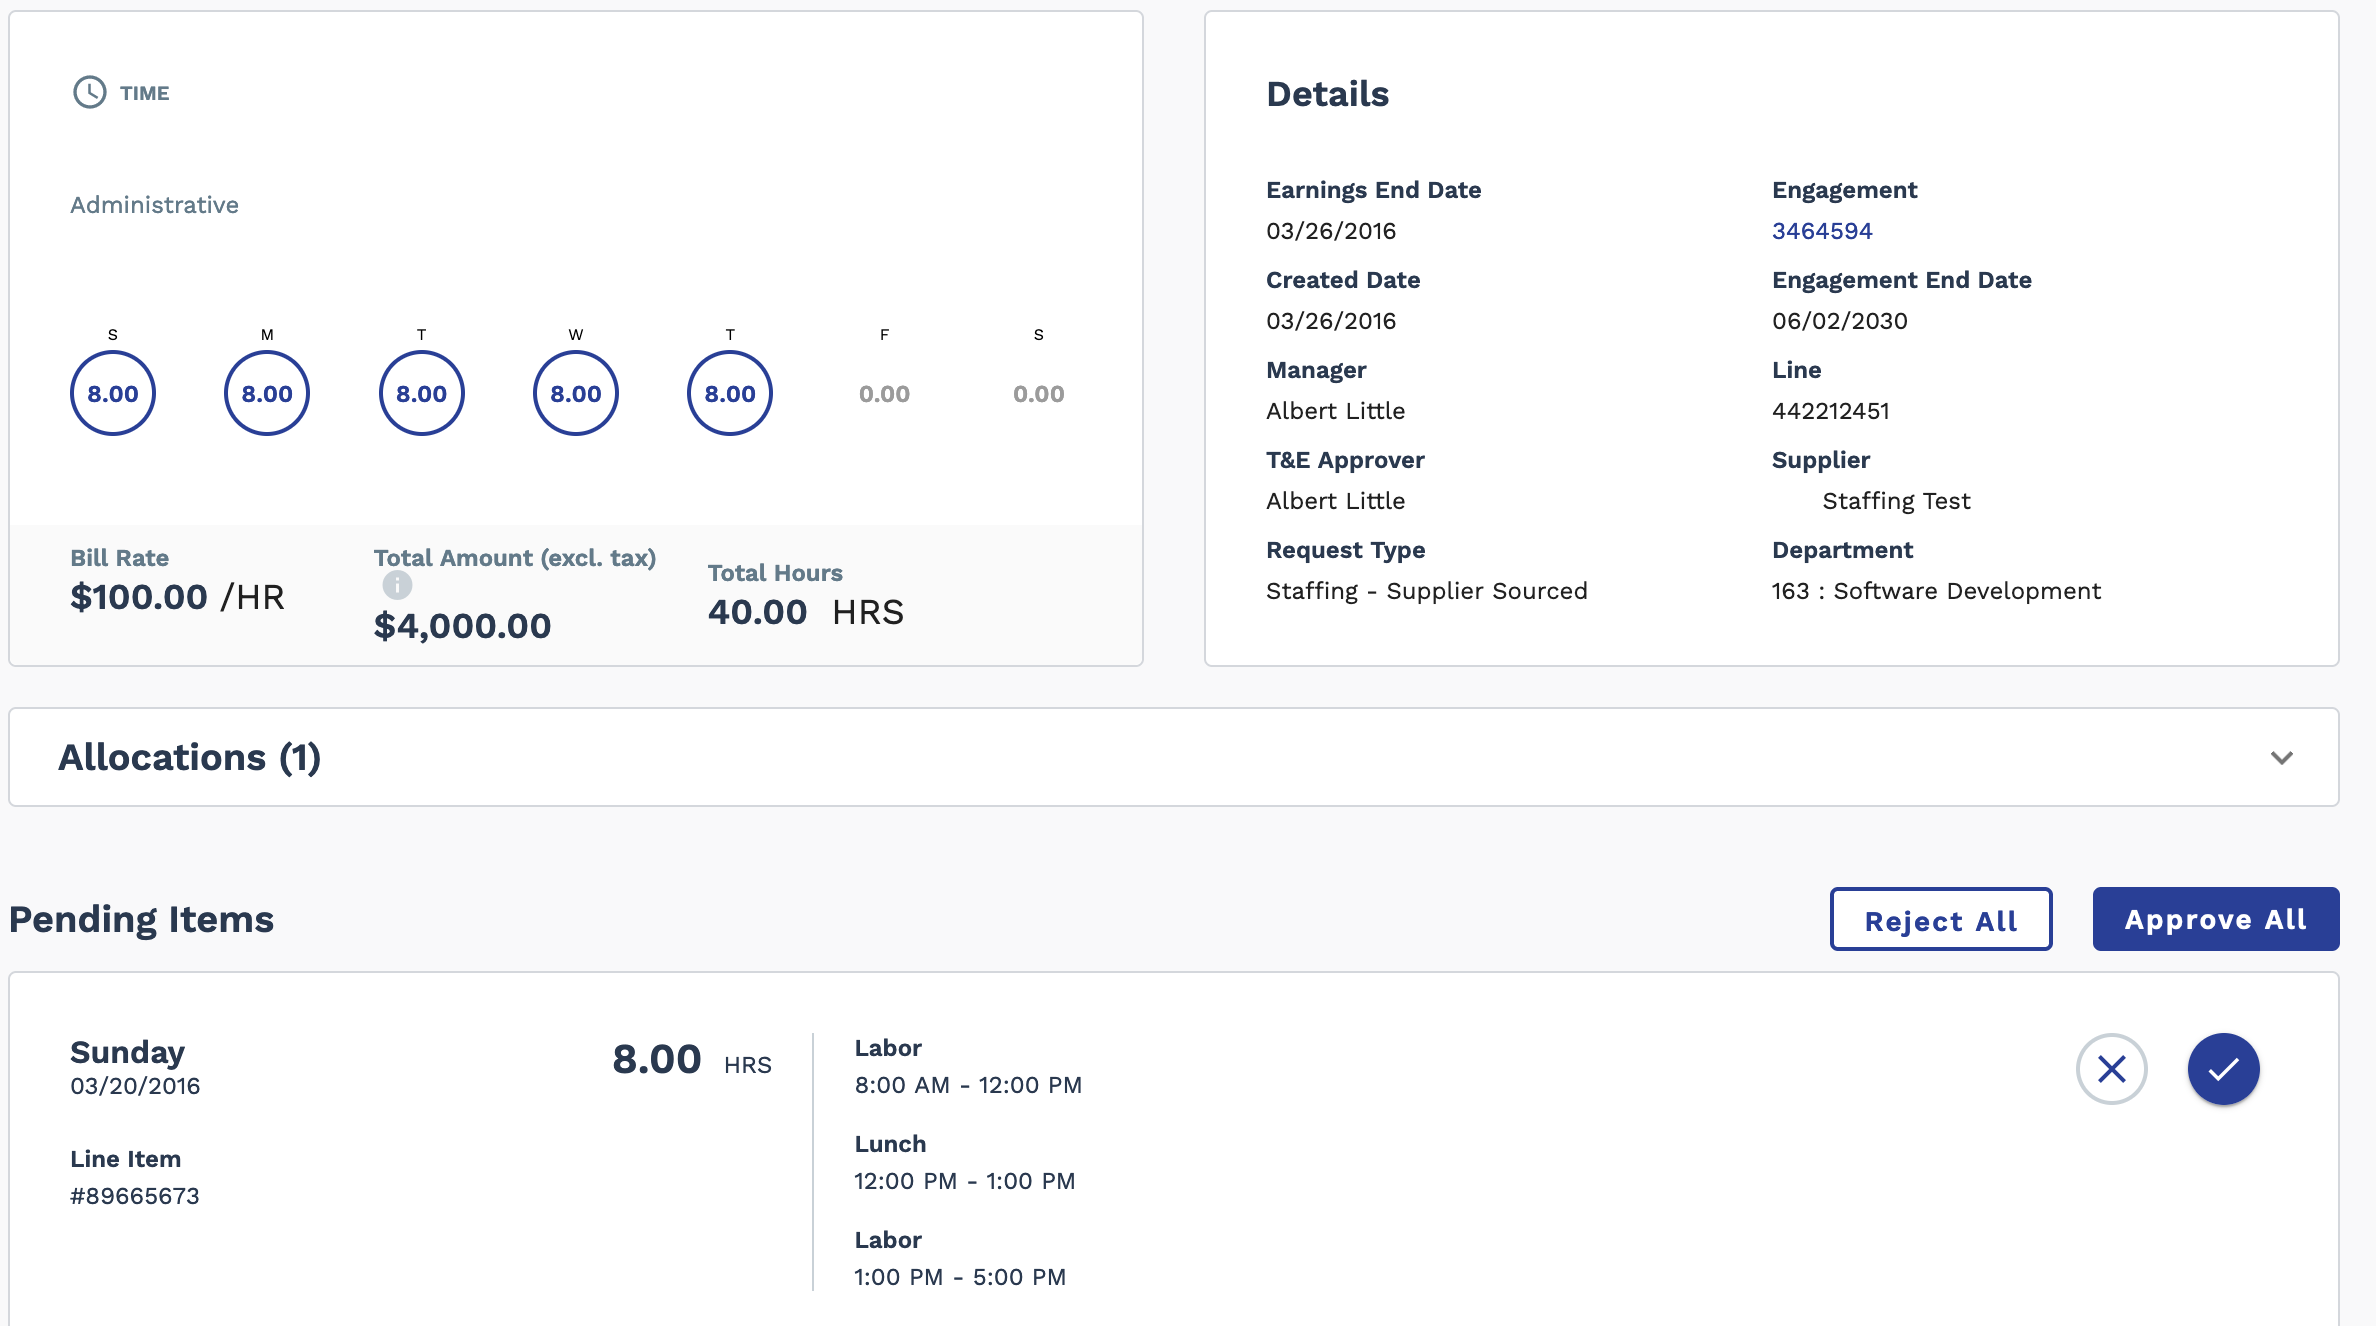
You can approve/reject the entire timecard, or go billing by billing. Badges and icons next to values let you know if something is overtime, doubletime, and so on.
Expenses are usually broken out one billing at a time, giving greater granular depth when viewing details.
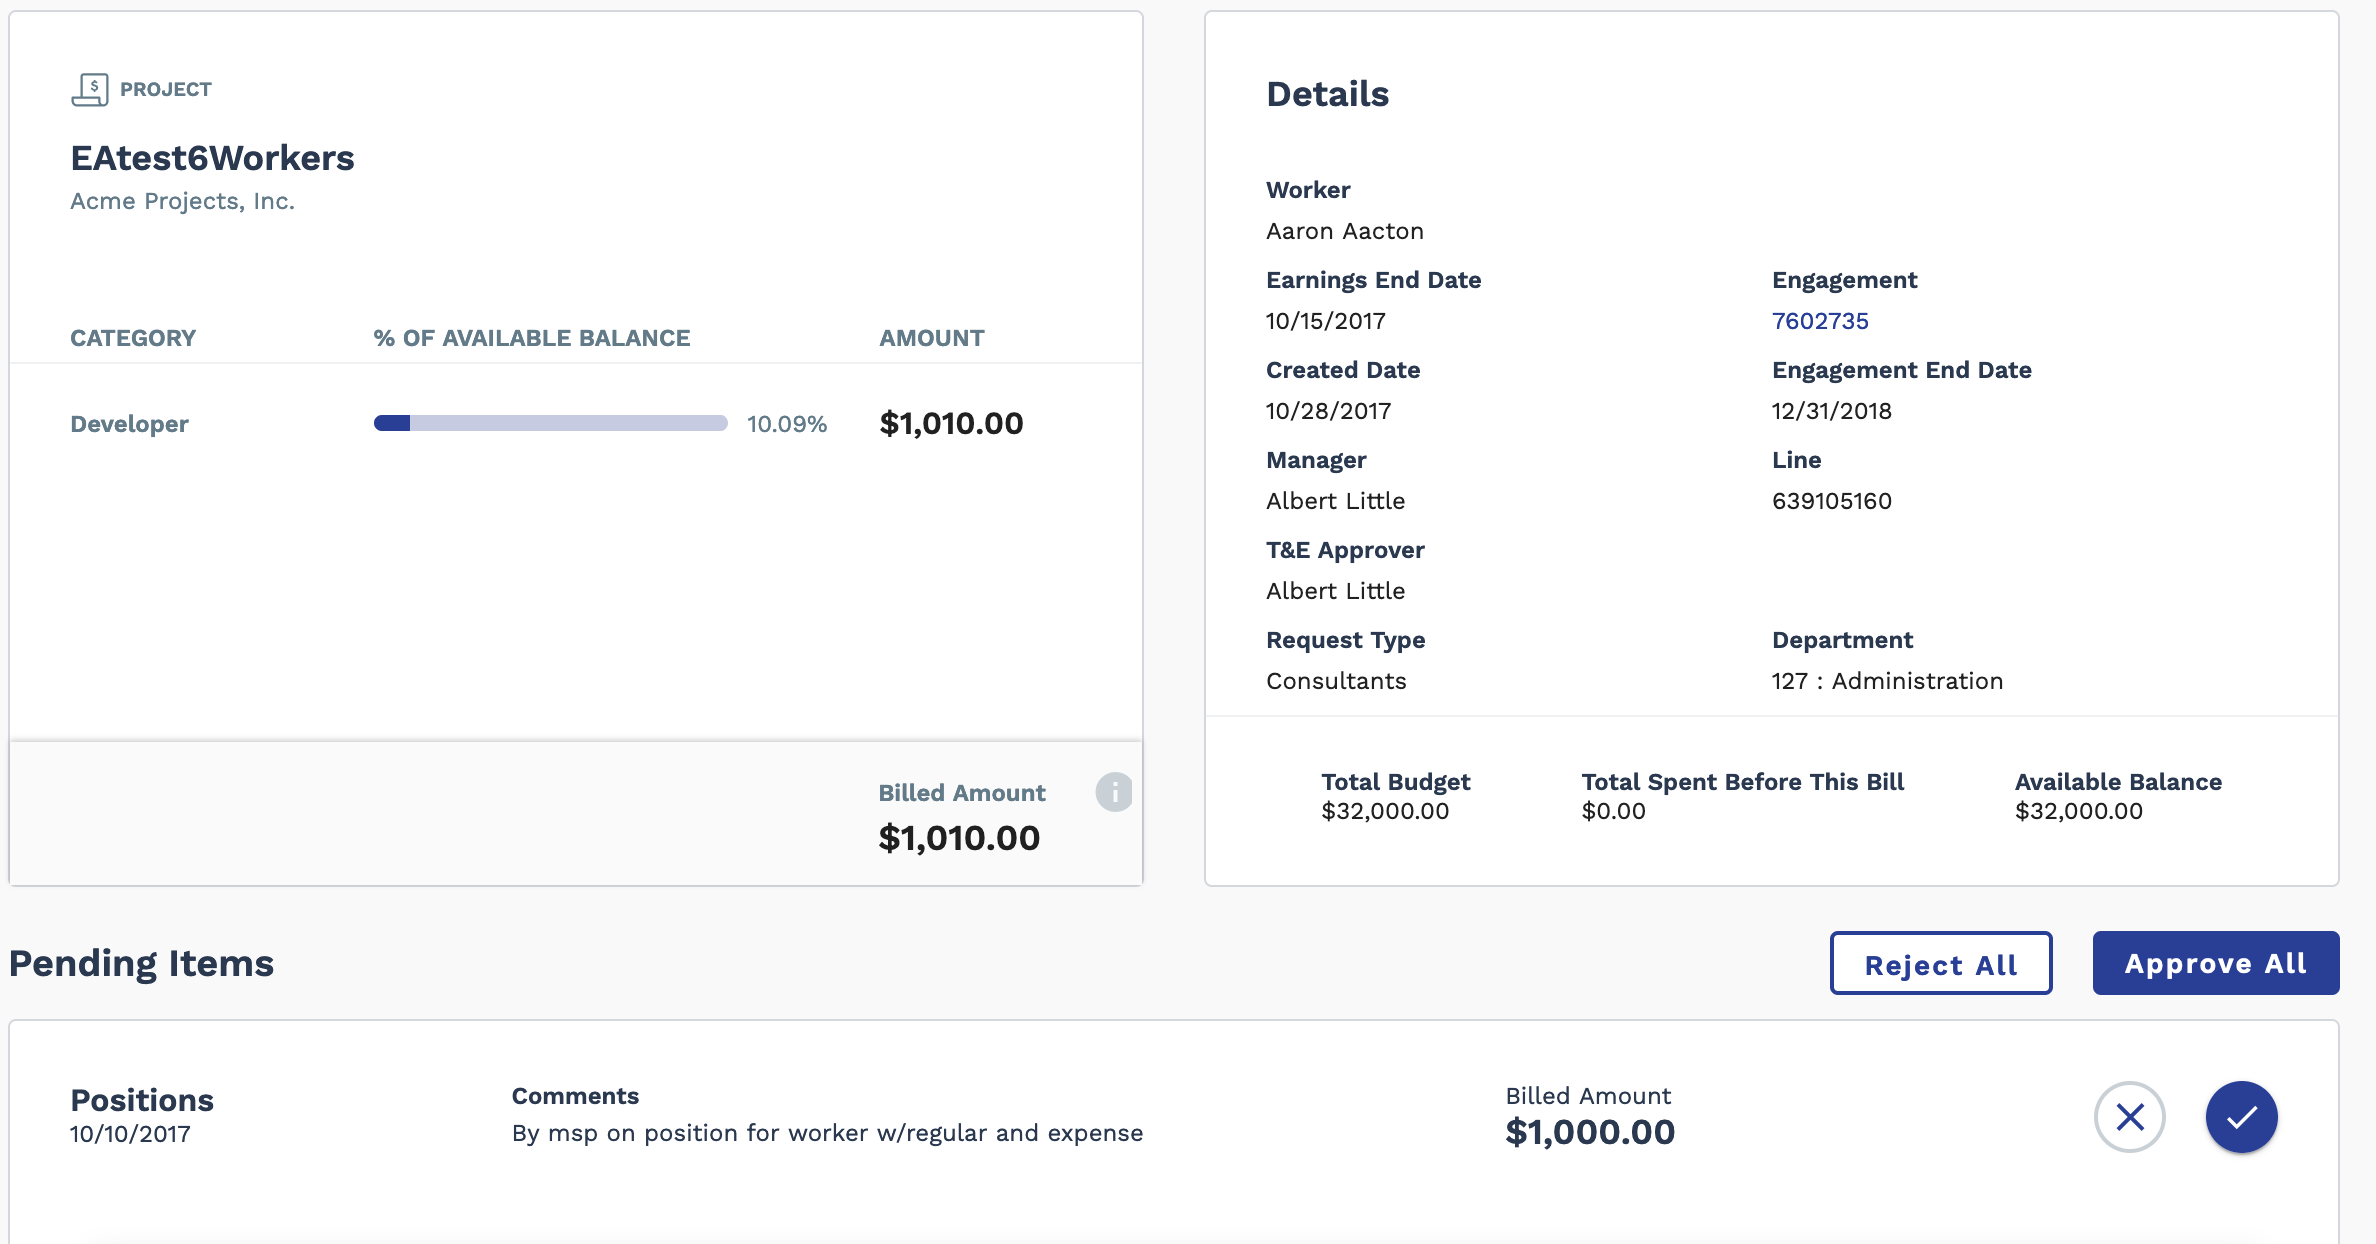
Like timecards, more than one item (receipts, etc.) can be attached to a submitted expense report. You can reject or approve one or many items.
Some billings have allocations associated. Allocations are, for example, cost centers
or accounts that an item should be billed to, and appear as fields on a billing.
Some allocations are added to an item by a worker, a vendor, or a program
representative, and you can add additional values by clicking ![]() . Allocations are a way of billing to alternative areas
or accounts that are not otherwise stated in the job information, for example, a
worker is assigned a job in one department, but completes work for another
department as part of the job. Allocations can also be used to track specific
projects that resources are supporting. The allocation can be set to the department
for whom the work was done. It should be noted that not all billings have allocation
options, and if allocations are used, then input values are required.
. Allocations are a way of billing to alternative areas
or accounts that are not otherwise stated in the job information, for example, a
worker is assigned a job in one department, but completes work for another
department as part of the job. Allocations can also be used to track specific
projects that resources are supporting. The allocation can be set to the department
for whom the work was done. It should be noted that not all billings have allocation
options, and if allocations are used, then input values are required.
Reviewing Candidates
All candidates that are submitted to open requests in your organization (and are vetted by a program representative if required) appear to you in the application. It is important to note that you can also be made aware of candidates by being notified through an email generated by the system.
Candidates appear in two places, the Home page, and the Review Talent page. Both places display candidates in the same way, as a table where you can take quick actions on by clicking buttons. The Review Talent view also has informational fields in additional to the buttons.
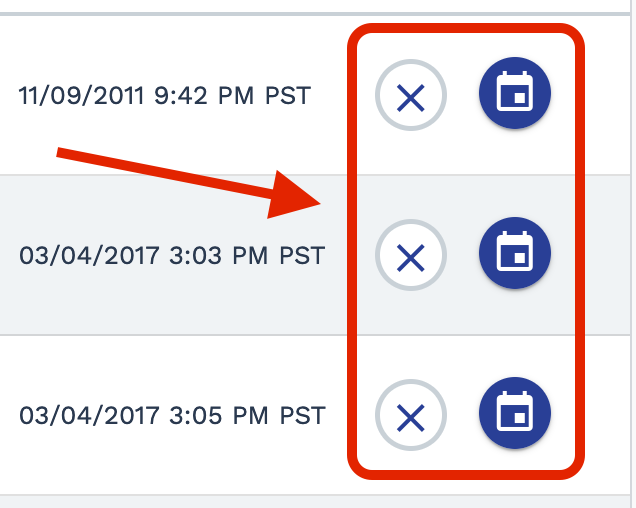
These buttons appear in the table, and let you either reject a candidate, or set up an interview. Clicking the candidate's name opens the details page where you can take the same actions, review a candidate in detail, and assign the candidate to a work request.
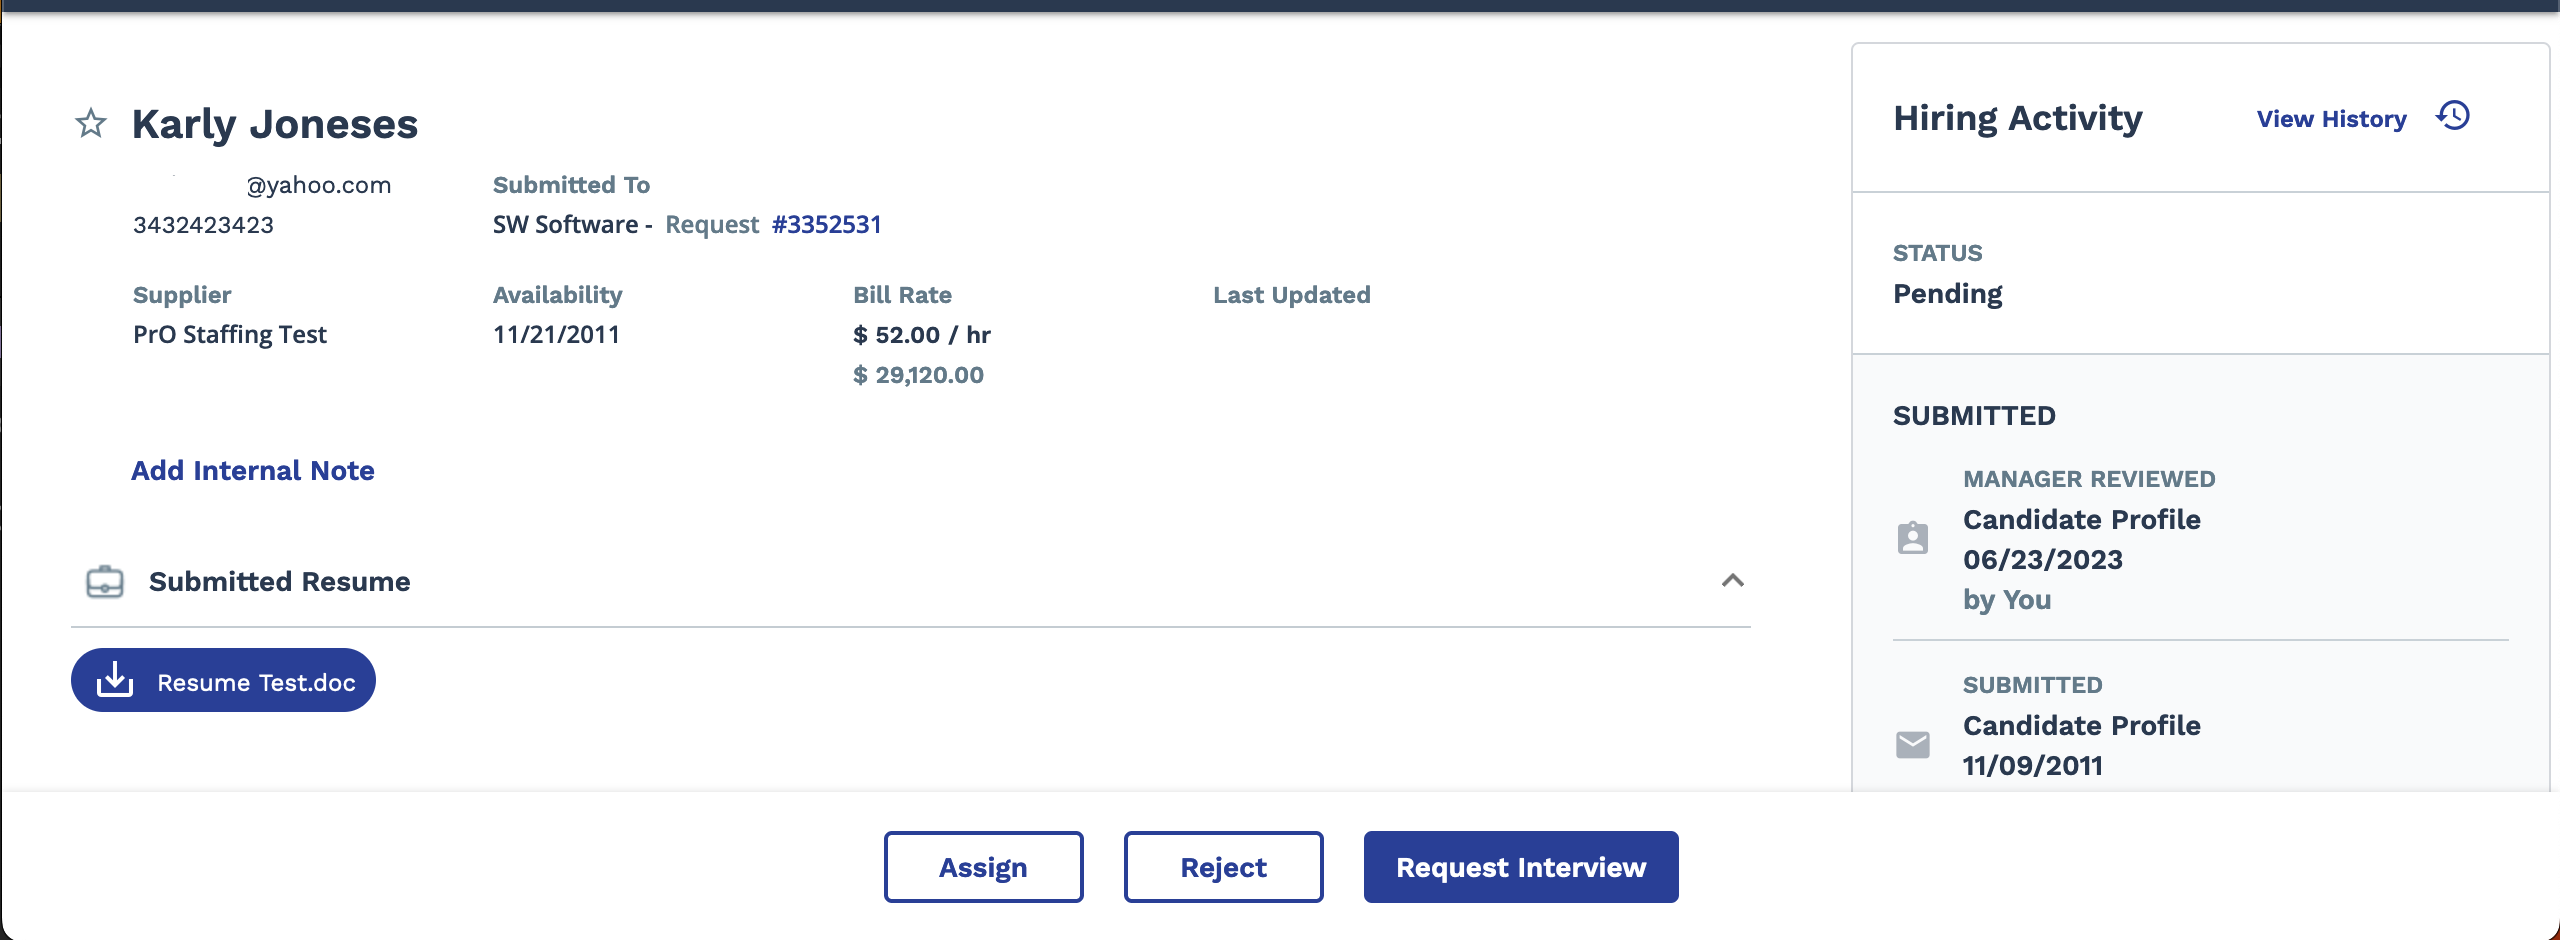
The other way that you can review candidates for a job is by opening the request itself. You do this by clicking a request on the Home page, or by navigating to the Requests page. Locate your work request using the search field, or by navigating the table. Once you locate the request, click the blue job title, opening the request details, then navigating to the Candidates tab. This displays all submitted candidates for that job only.
The Candidates tab features a search field to filter the view.
An additional advantage to using this tab view is that you can compare two
candidates using the compare functionality. Use the check boxes to make selections
form the table, and then click ![]() . This opens a pop up with all details side-by-side to
help you make a decision faster.
. This opens a pop up with all details side-by-side to
help you make a decision faster.
If a candidate meets your requirements, and has passed any tests or required
interviews, you can assign the worker to the job. To assign the worker in the
system, select the worker and open the details page, and then click ![]() . You need to confirm dates in the pop up before the
worker can begin. You program administrator also needs to configure important
details of the worker before onboarding can begin.
. You need to confirm dates in the pop up before the
worker can begin. You program administrator also needs to configure important
details of the worker before onboarding can begin.
Requests for Work
The application lets you request people and proposals for work in your organization. Keep in mind that this process is highly configurable. You also might not be required to complete this workflow. At times, the process is completed by a program representative, where you would only review candidates that were submitted for requests, and interview those qualified candidates.
Another important note is that you might not have permission to modify data related to work that you are requesting. This data is information such as job titles, job descriptions, or minimum requirements for candidates. In this case, you can select a job that has been preconfigured for your organization and then select the dates of employment and location where the work is performed.
The application makes requesting work simple. Click a button in the left navigation menu on any page. You are taken to a 'Create Request' wizard that walks you through the required steps for your work request. You add your requirements to the request, which include the job title and location.
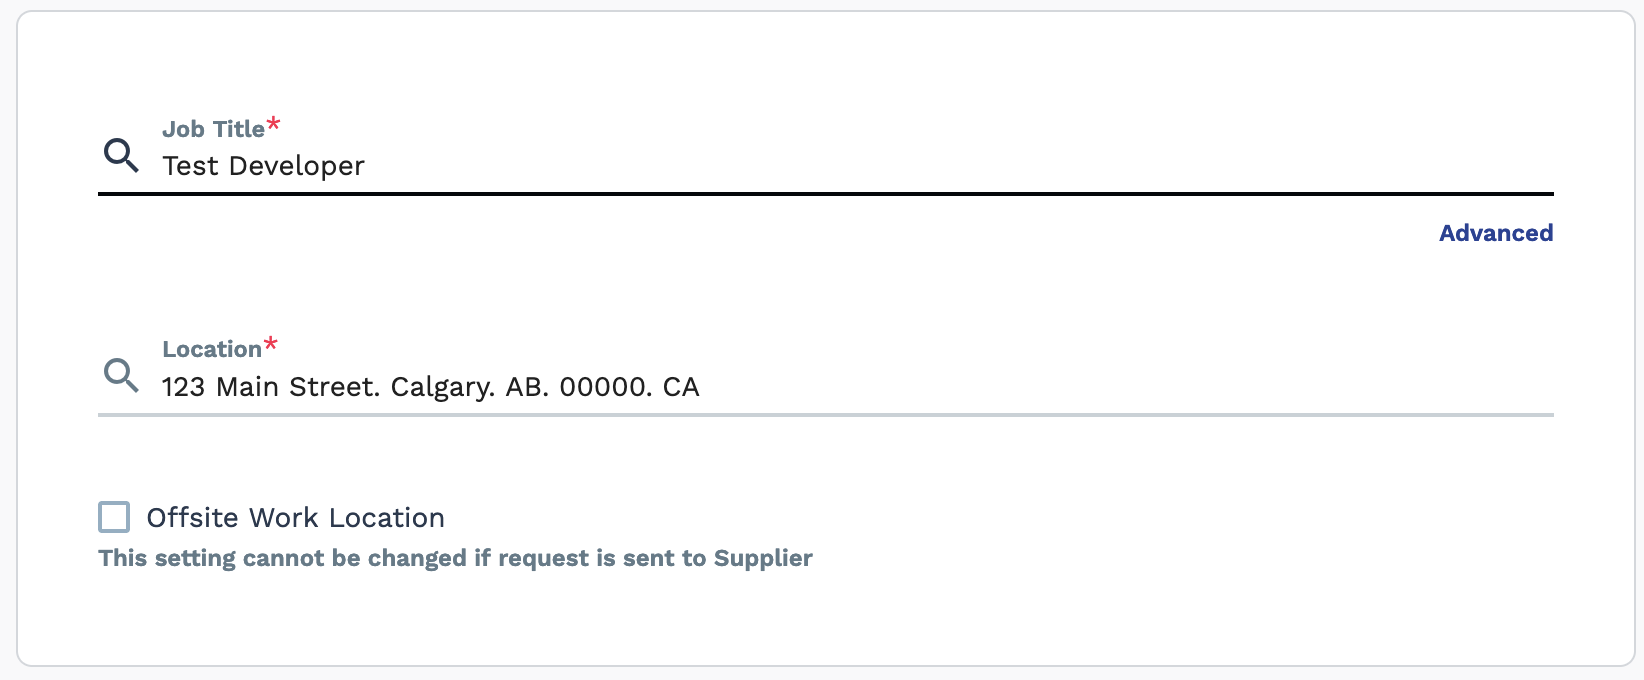
Next, set up the details of the job. Details include the dates, any required skills, languages, and so on. An important part of the job details is the financials for the position. The financials set the manner for payment, and the rates for the work that the worker is paid.
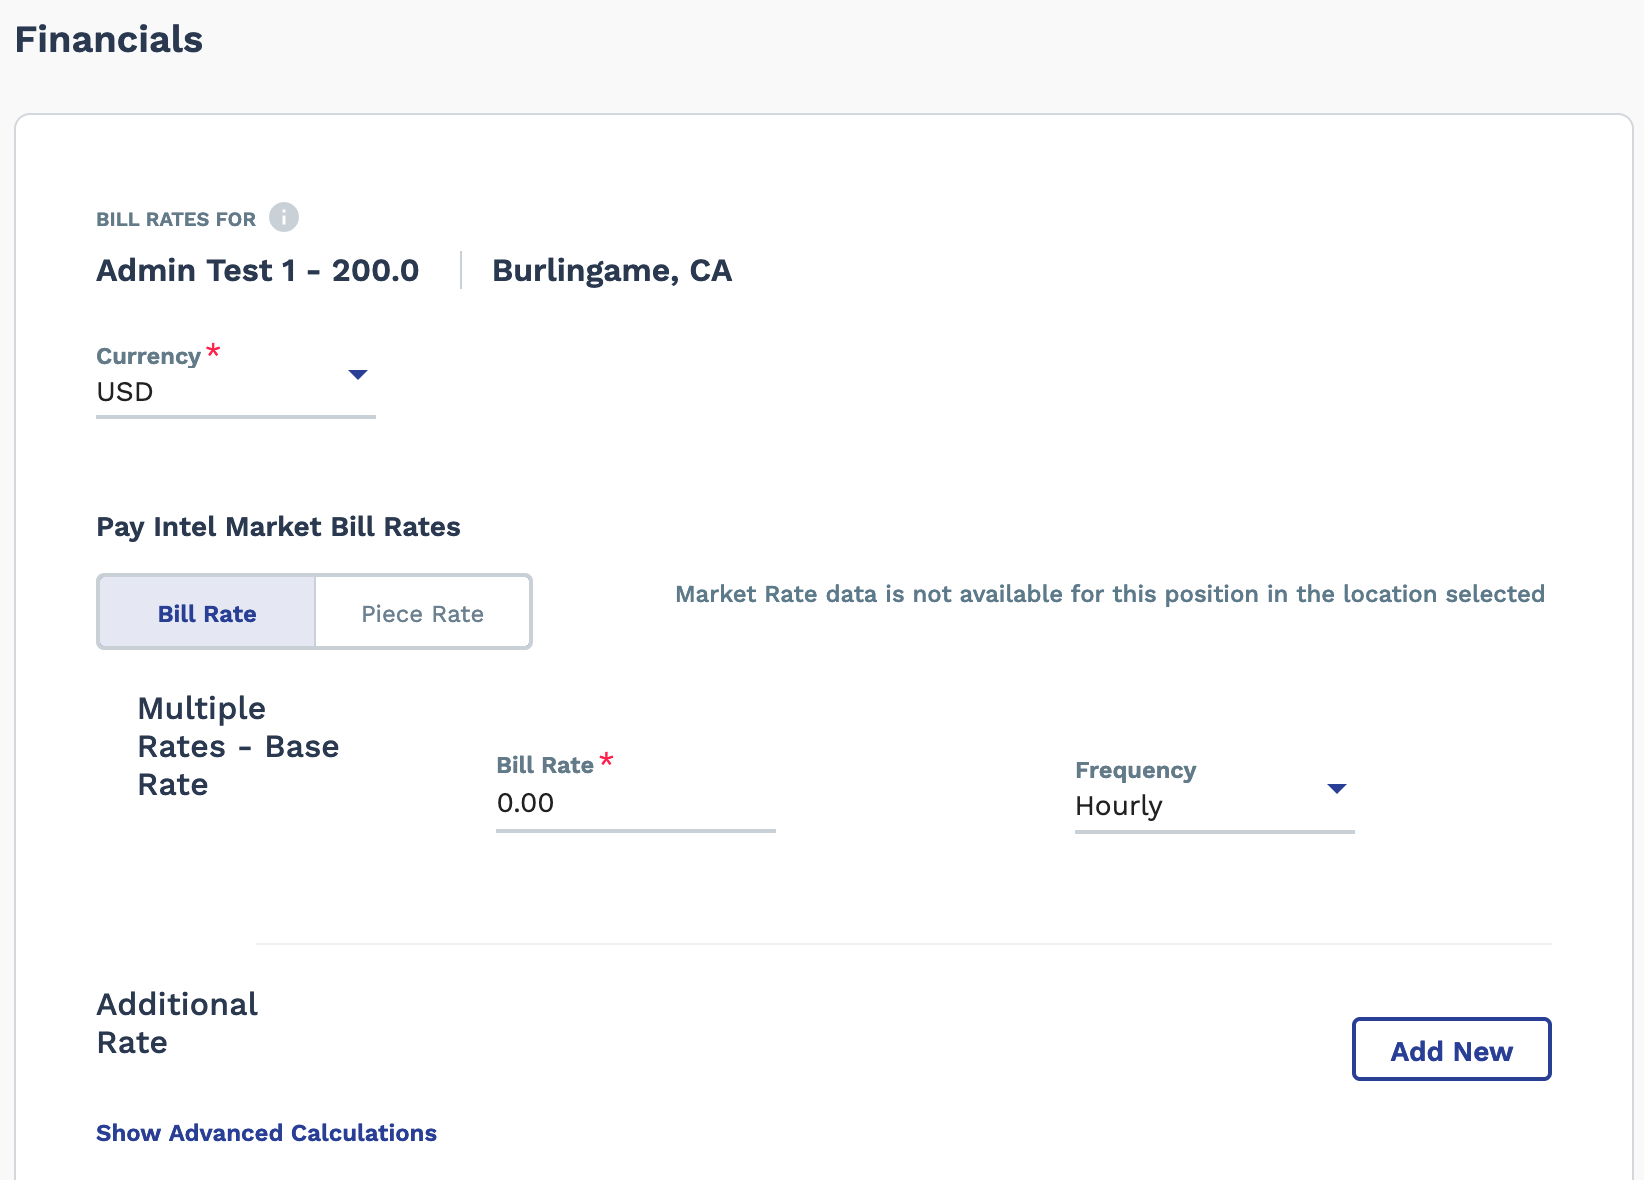
Note that the financials for a job are configured for your organization, and not all options will be available to you.
After you configure the job, select the source for candidates. Depending on how your organization is configured, you are shown a list of suppliers that have agreements configured in the system by your program provider. Suppliers/vendors that appear in this view are notified to submit candidates to the request.
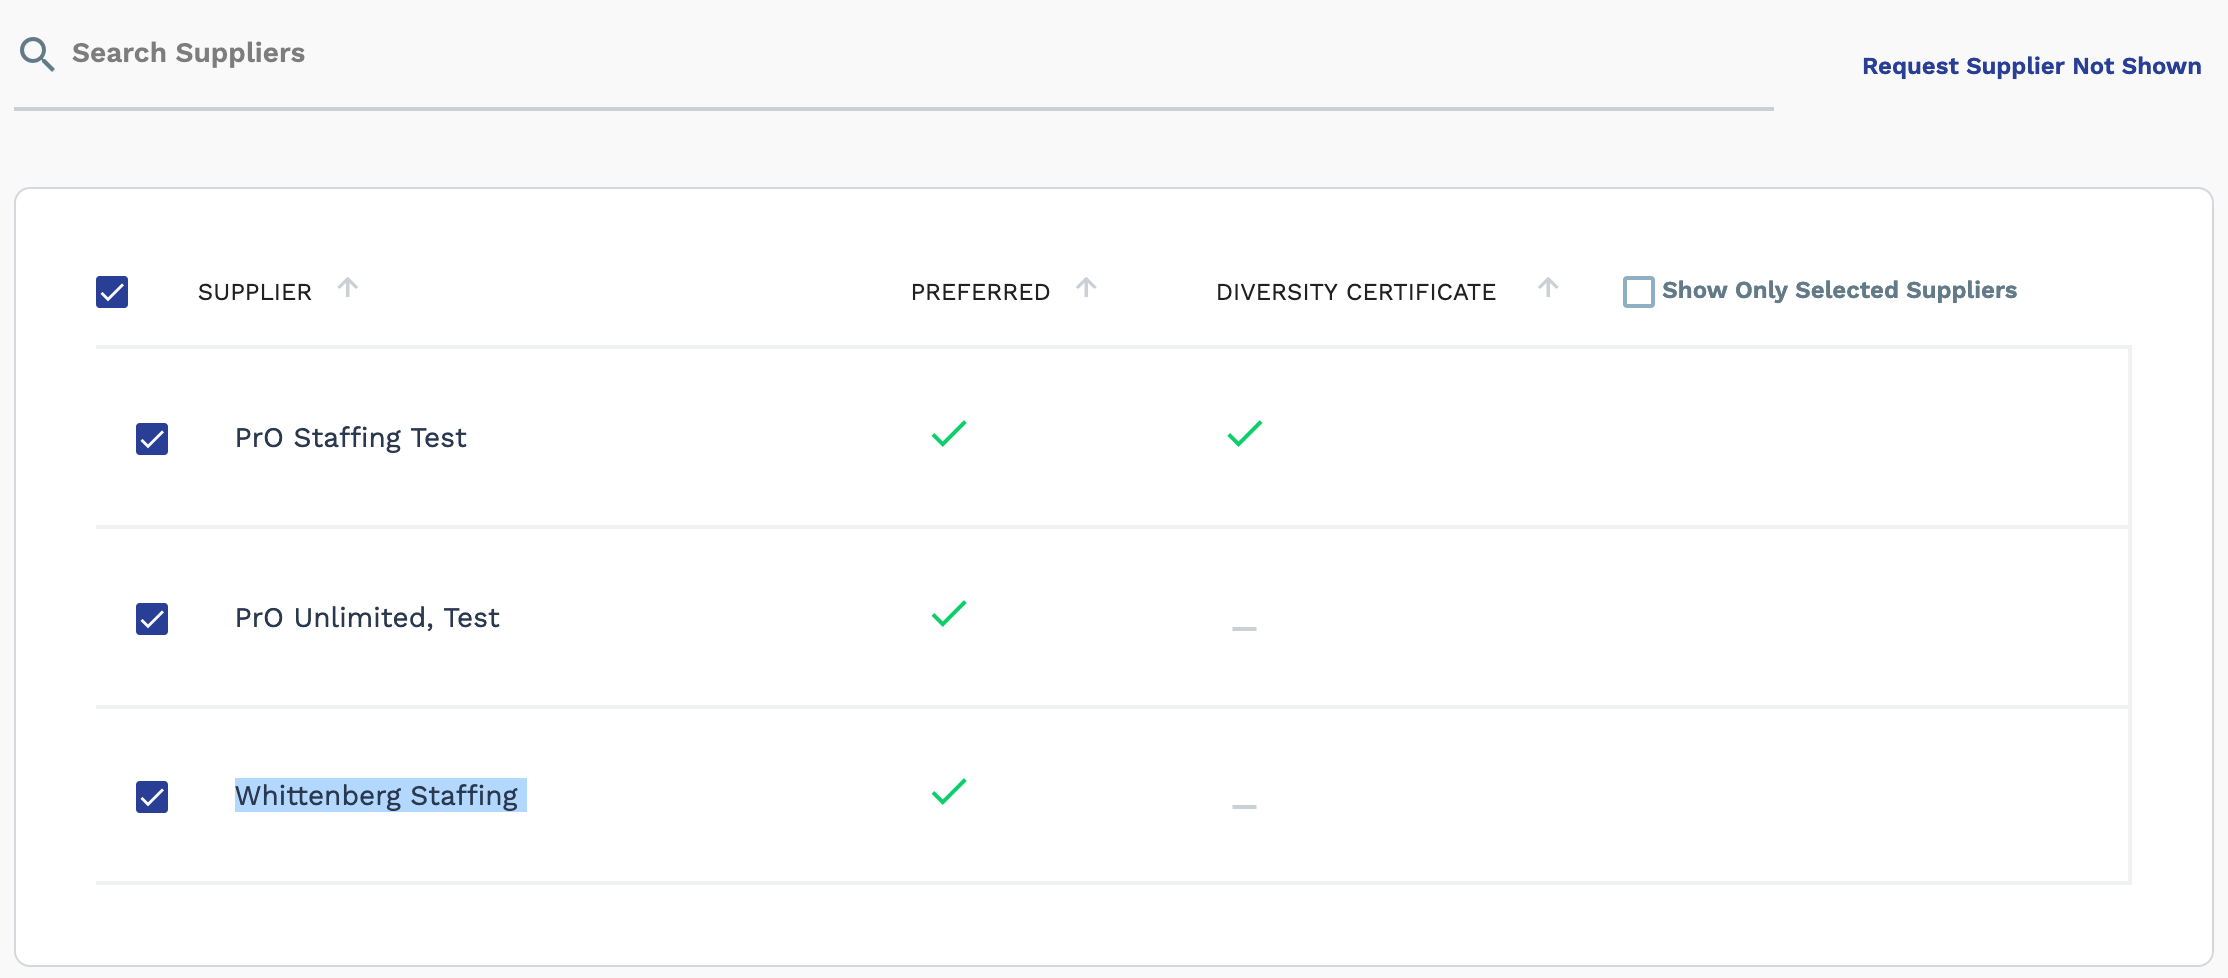
Once your job request is filled out, review the details once more and submit it. You are notified of submitted candidates on the Home page, the Candidates tab, and by email (if configured).
Your Profile
Your profile is where you manage all of your personal information, that is, all of the information associated with your application account. The difference between your personal and organization information is that your personal information is managed in the profile by you, and your organizational information is managed by administrators, or by program representatives.
Your profile includes contact information, where your work location is, and application information as it applies to your username, language preference, etc.
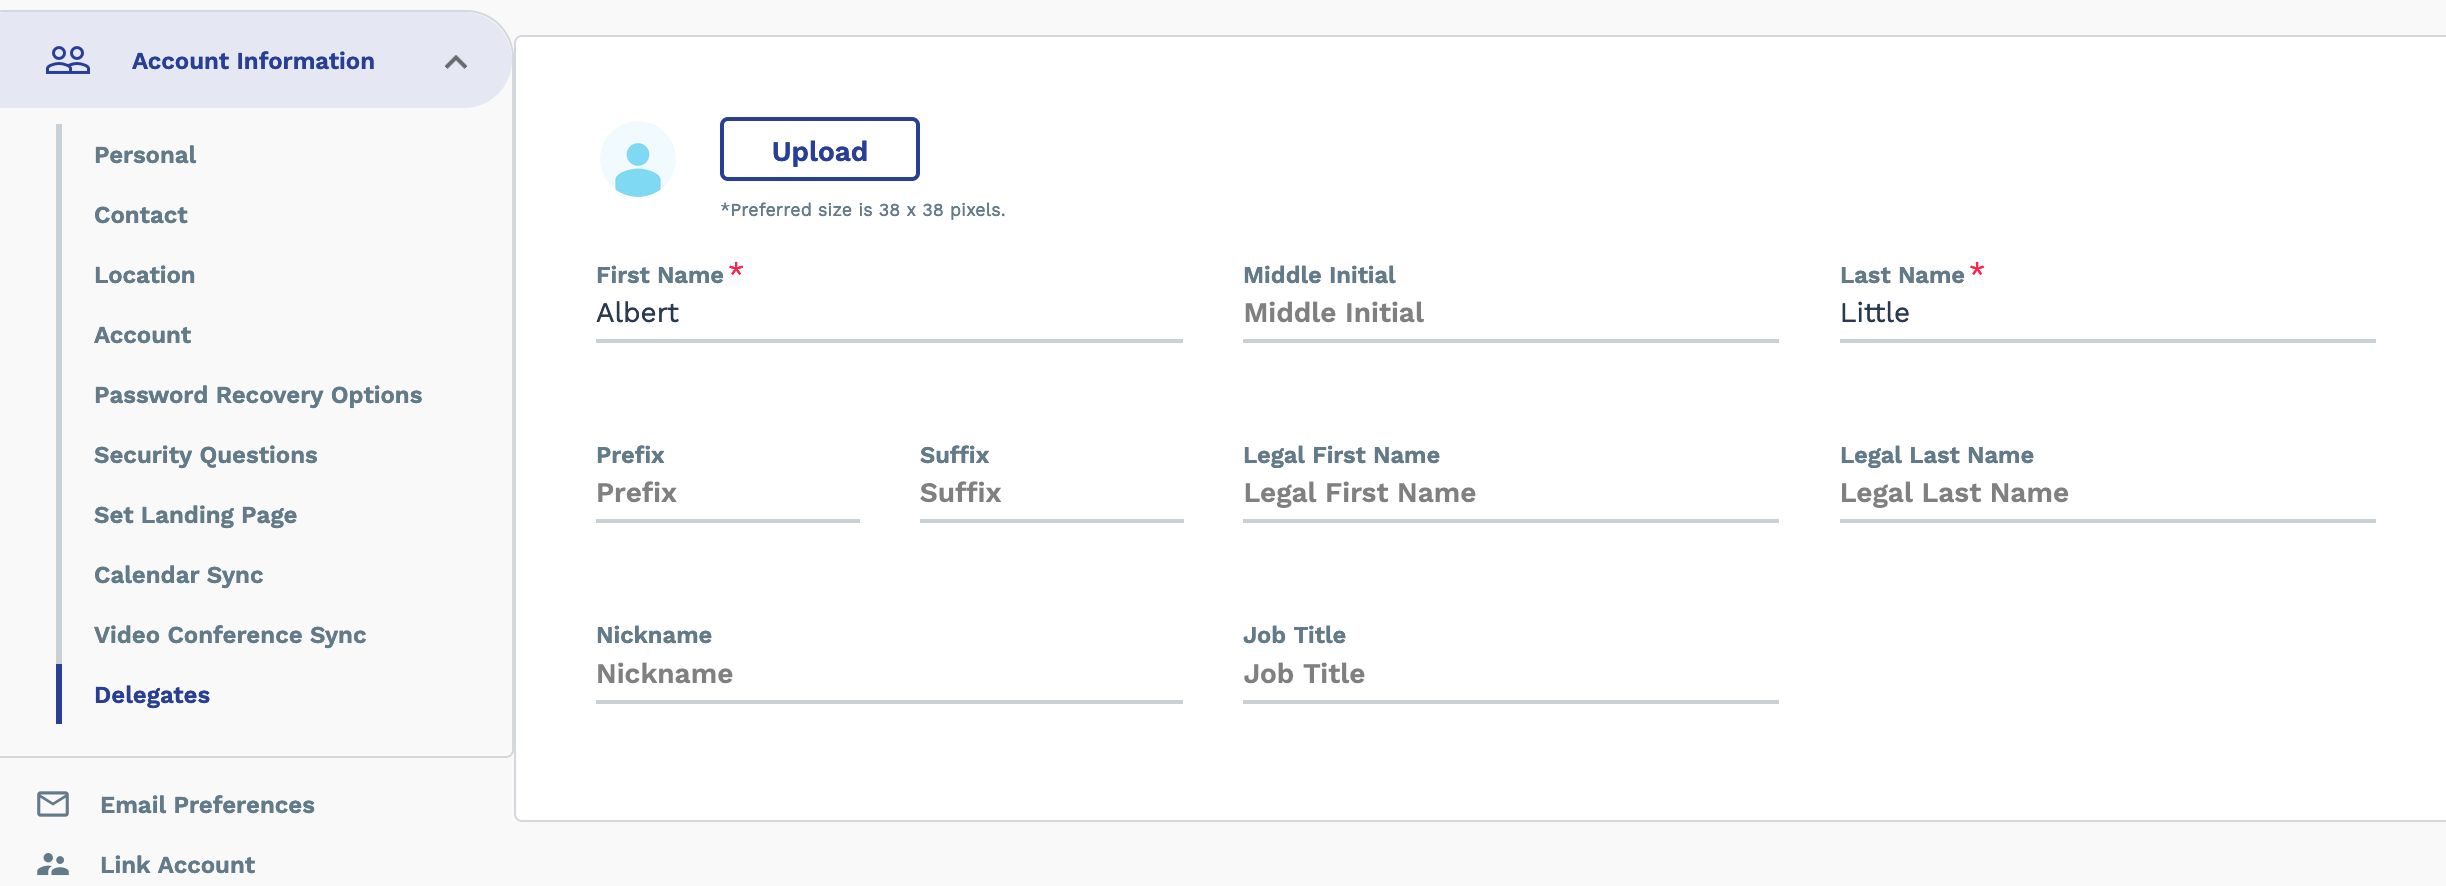
Along with personal details, you can view and set your password for the application. Password recovery options are also available through your profile. See Update Password Recovery Options.
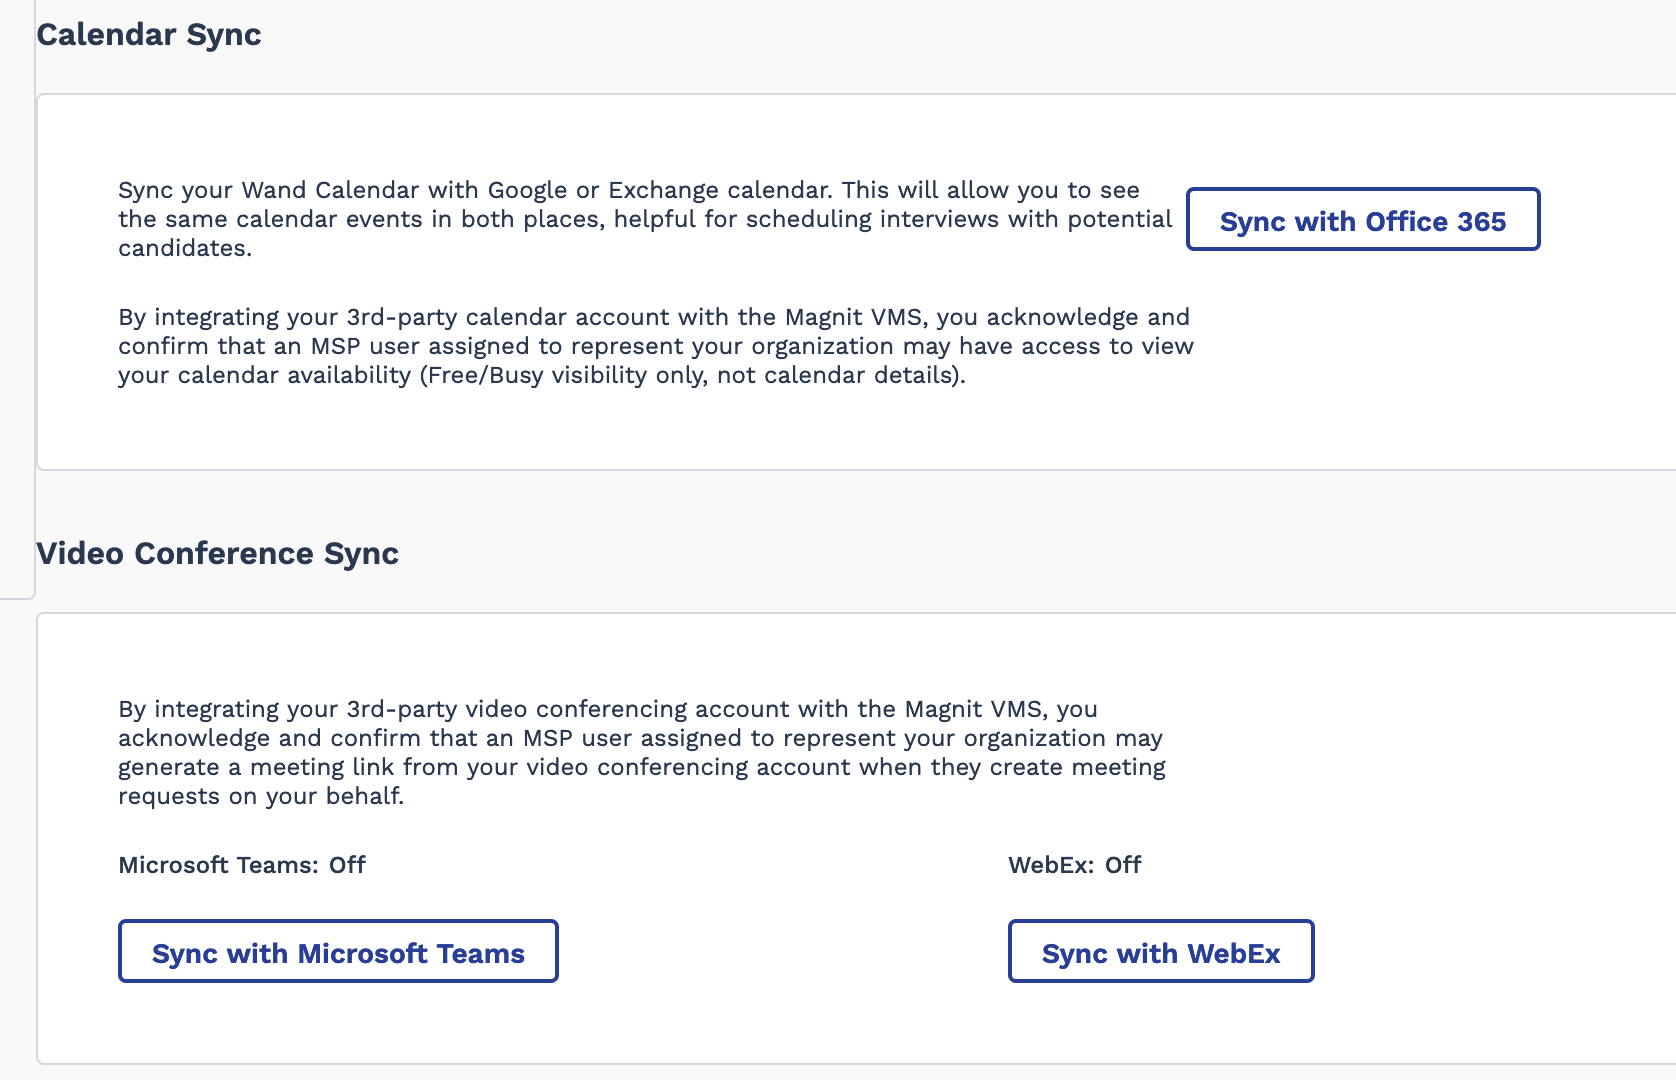
The application gives you the ability to integrate with 3rd party applications for greater work efficiency. You can sync an external calendar that will add important calendar items from the system (for example, interview blocks of time). You can also integrate your account with a video conferencing tool with the application. This integration configures meeting links in the external tool when schedule video-style interviews, and adds the conference details to the interview details.
Another important feature to note in your user profile is the delegation functionality. Delegation allows designated members in your organization to take action on your behalf. When approval (or rejection) is required, the system routes the notification to your delegate. Delegates have to be manager users, and you can segment their permissions, such as approving billing, and permission to create a request for work on your behalf.