Home Page
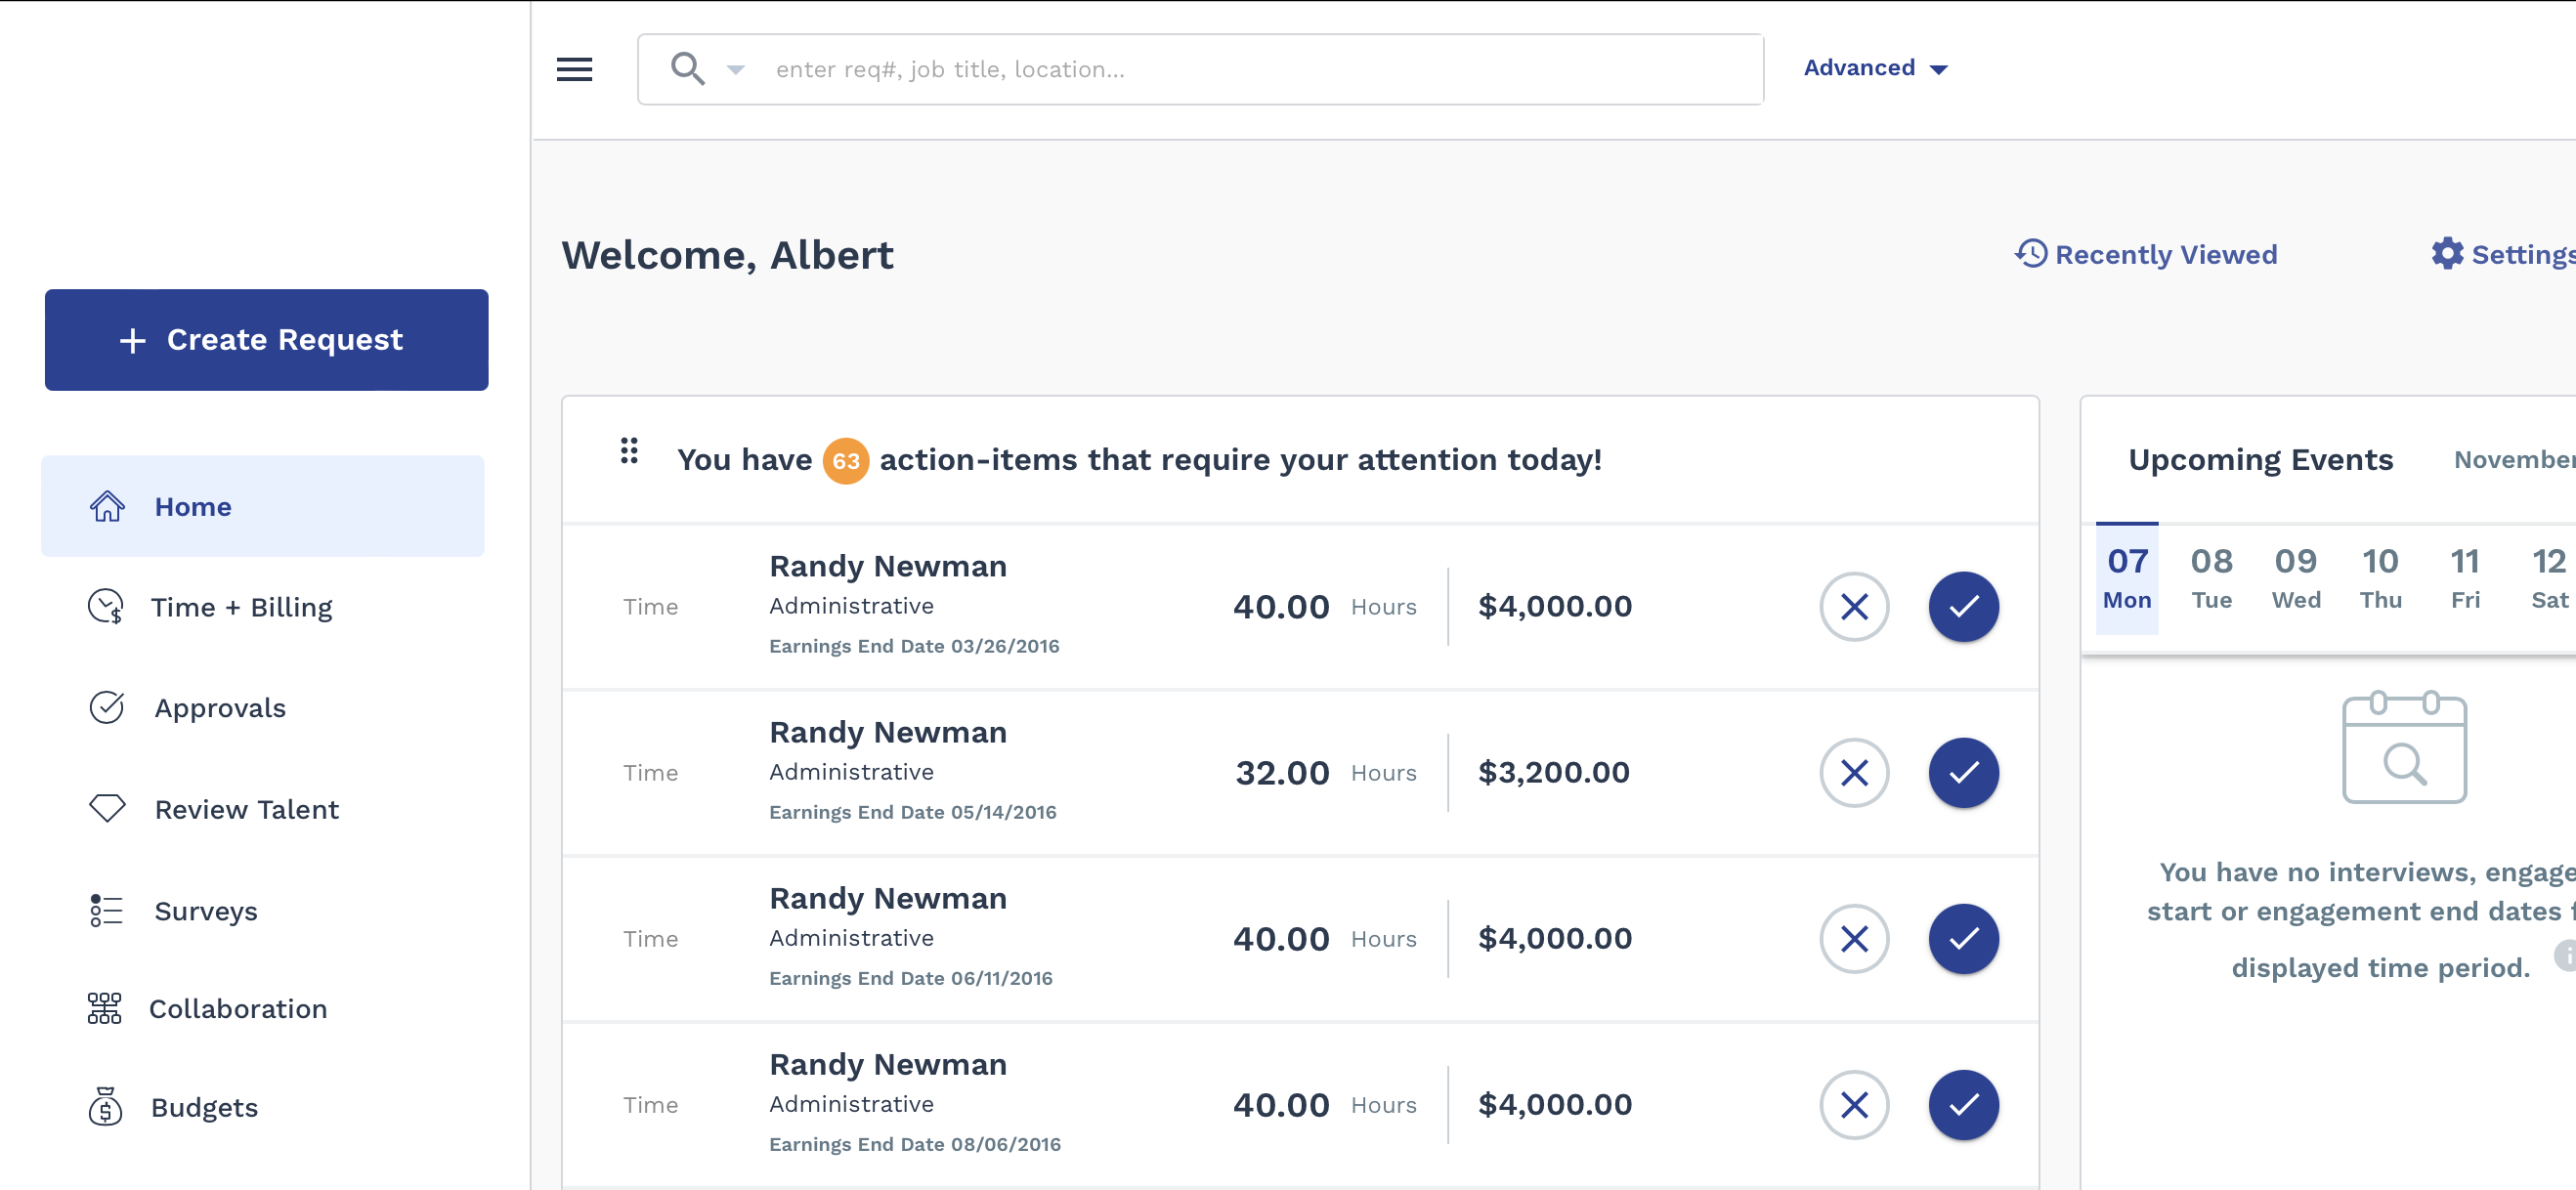
The Home displays a consolidated view of items that you need to take action on, and notifications that are relevant to the requests/engagements which you are assigned.
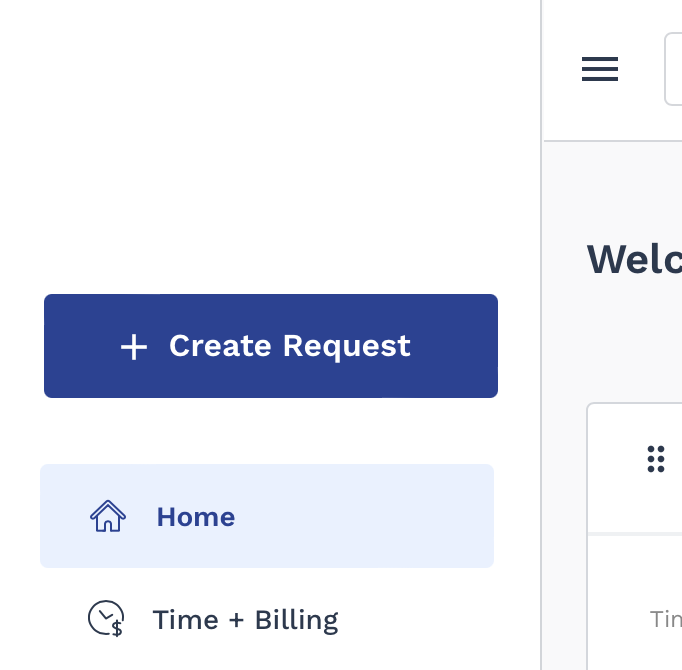
Any section on the Home page can be expanded or collapsed using
the up and down arrows in top right corner of each card. You can rearrange any of the
sections on the page by clicking the dots icon in the top left corner of any section,
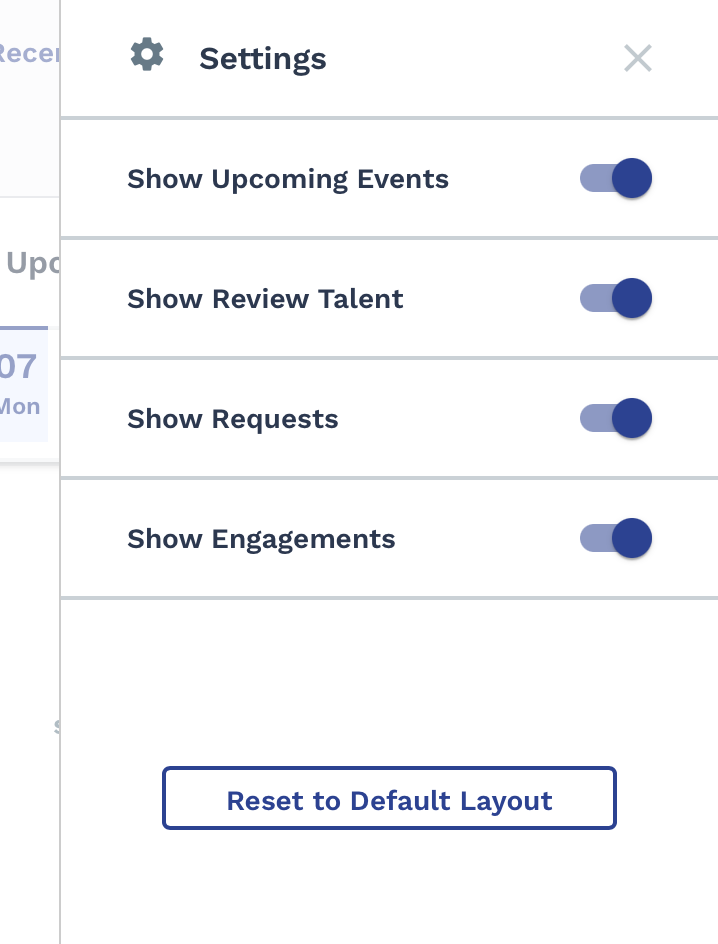
and drag it to the desired position. You can also add or remove any of the three
sections by clicking ![]() , and using the toggle switches:
, and using the toggle switches:
The Action Items section, displays any actions items that you might have to take on workers or requests/engagements. You can filter the view by using the filtering tiles in the header row. Each card in the view displays details about he pending action, and allows you to navigate to the section where you can take action (approve a candidate, extend EOA, and so on).
 - Opens the interview configuration page. You can
set up a request in this page. For more information about setting up interviews,
see Request an Interview with a Candidate.
- Opens the interview configuration page. You can
set up a request in this page. For more information about setting up interviews,
see Request an Interview with a Candidate. -
Rejects the submitted candidate for the request.
-
Rejects the submitted candidate for the request.
The Activity & Upcoming Events calendar displays events relevant to the your requests/engagements. You can link the calendar with a personal Google or Microsoft 365 calendar. This option is enabled in the client organization's configuration (). Also, in this view, you can cancel or reschedule an interview by clicking the link. For more information about linking calendars, see Resumes and Interviews Settings.
Use the application search to locate any information that you have access to view. You
can enter any text that describes the element that you want to view (engagements,
workers, locations, and so on). The search field ( ) appears at the top of the home page, as well as at the top
of all pages in the Manager view. Entering text prompts the VMS
to suggest items that contain the text, allowing you to find items without knowing
specifics. You can toggle between your records and records for which you are a delegate.
You must be set up as a delegate in order for you to use this feature. For more
information about delegation, see Delegation.
) appears at the top of the home page, as well as at the top
of all pages in the Manager view. Entering text prompts the VMS
to suggest items that contain the text, allowing you to find items without knowing
specifics. You can toggle between your records and records for which you are a delegate.
You must be set up as a delegate in order for you to use this feature. For more
information about delegation, see Delegation.
The text on this page (instructional text and empty state text) can be customized to suit the client organization's branding requirements. For more information about customization, see Instructional Text Configuration.
For more information about data encryption, see Bring Your Own Key Encryption.