Add Worker to Worker Grid
This action is performed when the Send for Worker Details option is used during request creation. If configured (Allow Workers Assignment setting enabled, see Define a Supplier Agreement.
Either the client manager specified on the request, the MSP assigned to the request, or the supplier/vendor with the correct permission assigned to the request can add workers. SysAdmin/MSP Admin users can also navigate to the request and add workers.
Adding a worker to a request automatically converts the worker to an engagement unless approval routing or onboarding is configured.
- Navigate to the Home page in the MSP view.
-
Select the request type by clicking the type link (or
ALL).
You can also enter the request number in the search field.
- Select the request by clicking the number link in the Requisition Number column.
-
On the Requests page, click the
Sourcing tab.
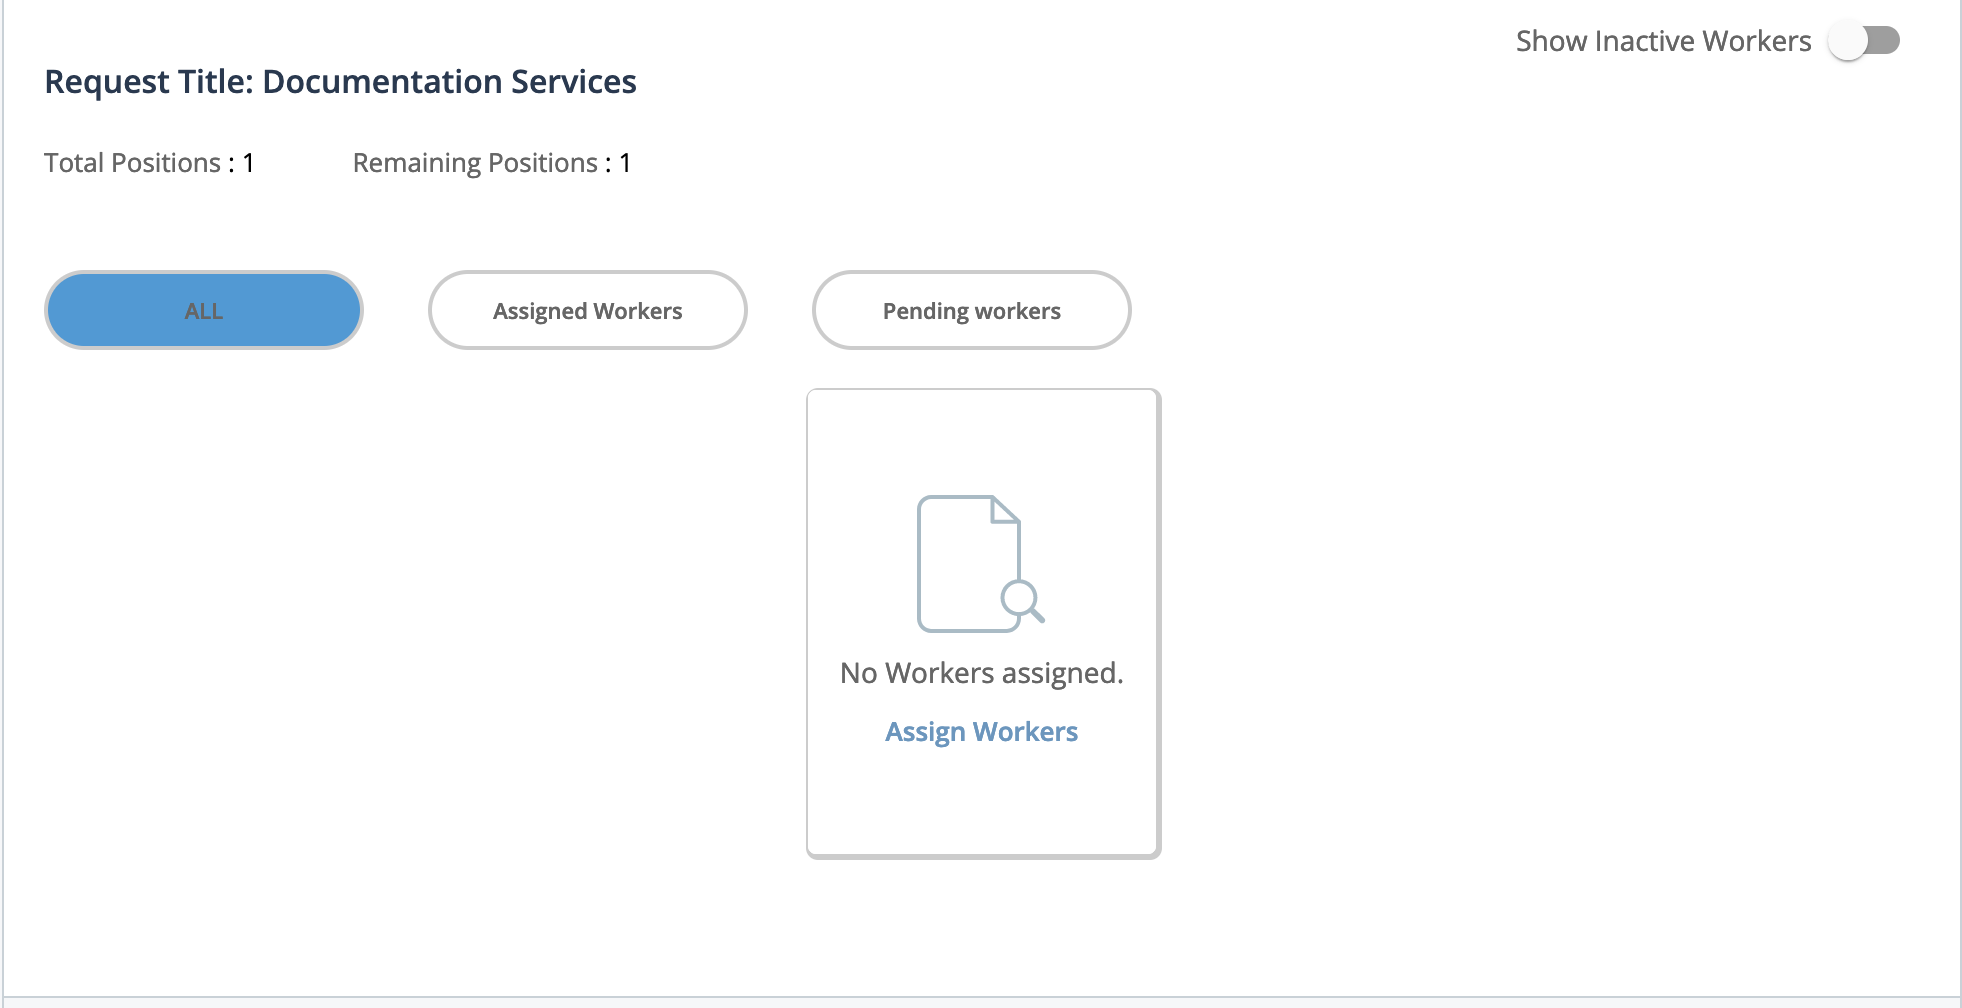
If no workers are assigned, the section appears empty. To add an initial worker, click the Assign Workers tile. If adding workers to a request, click Assign Workers in the upper right corner of the Sourcing section.
You can navigate the view using the buttons to display the following:- ALL - All workers associated with the request. This includes workers that are already added and have been converted to an engagement.
- Assigned Workers - All workers assigned to the request. Each worker is converted to an engagement.
- Pending Workers - All workers submitted by the client manager or supplier/vendor, but require MSP review.
- Click Assign Workers.
-
Using the Worker Grid, configure the worker's details.
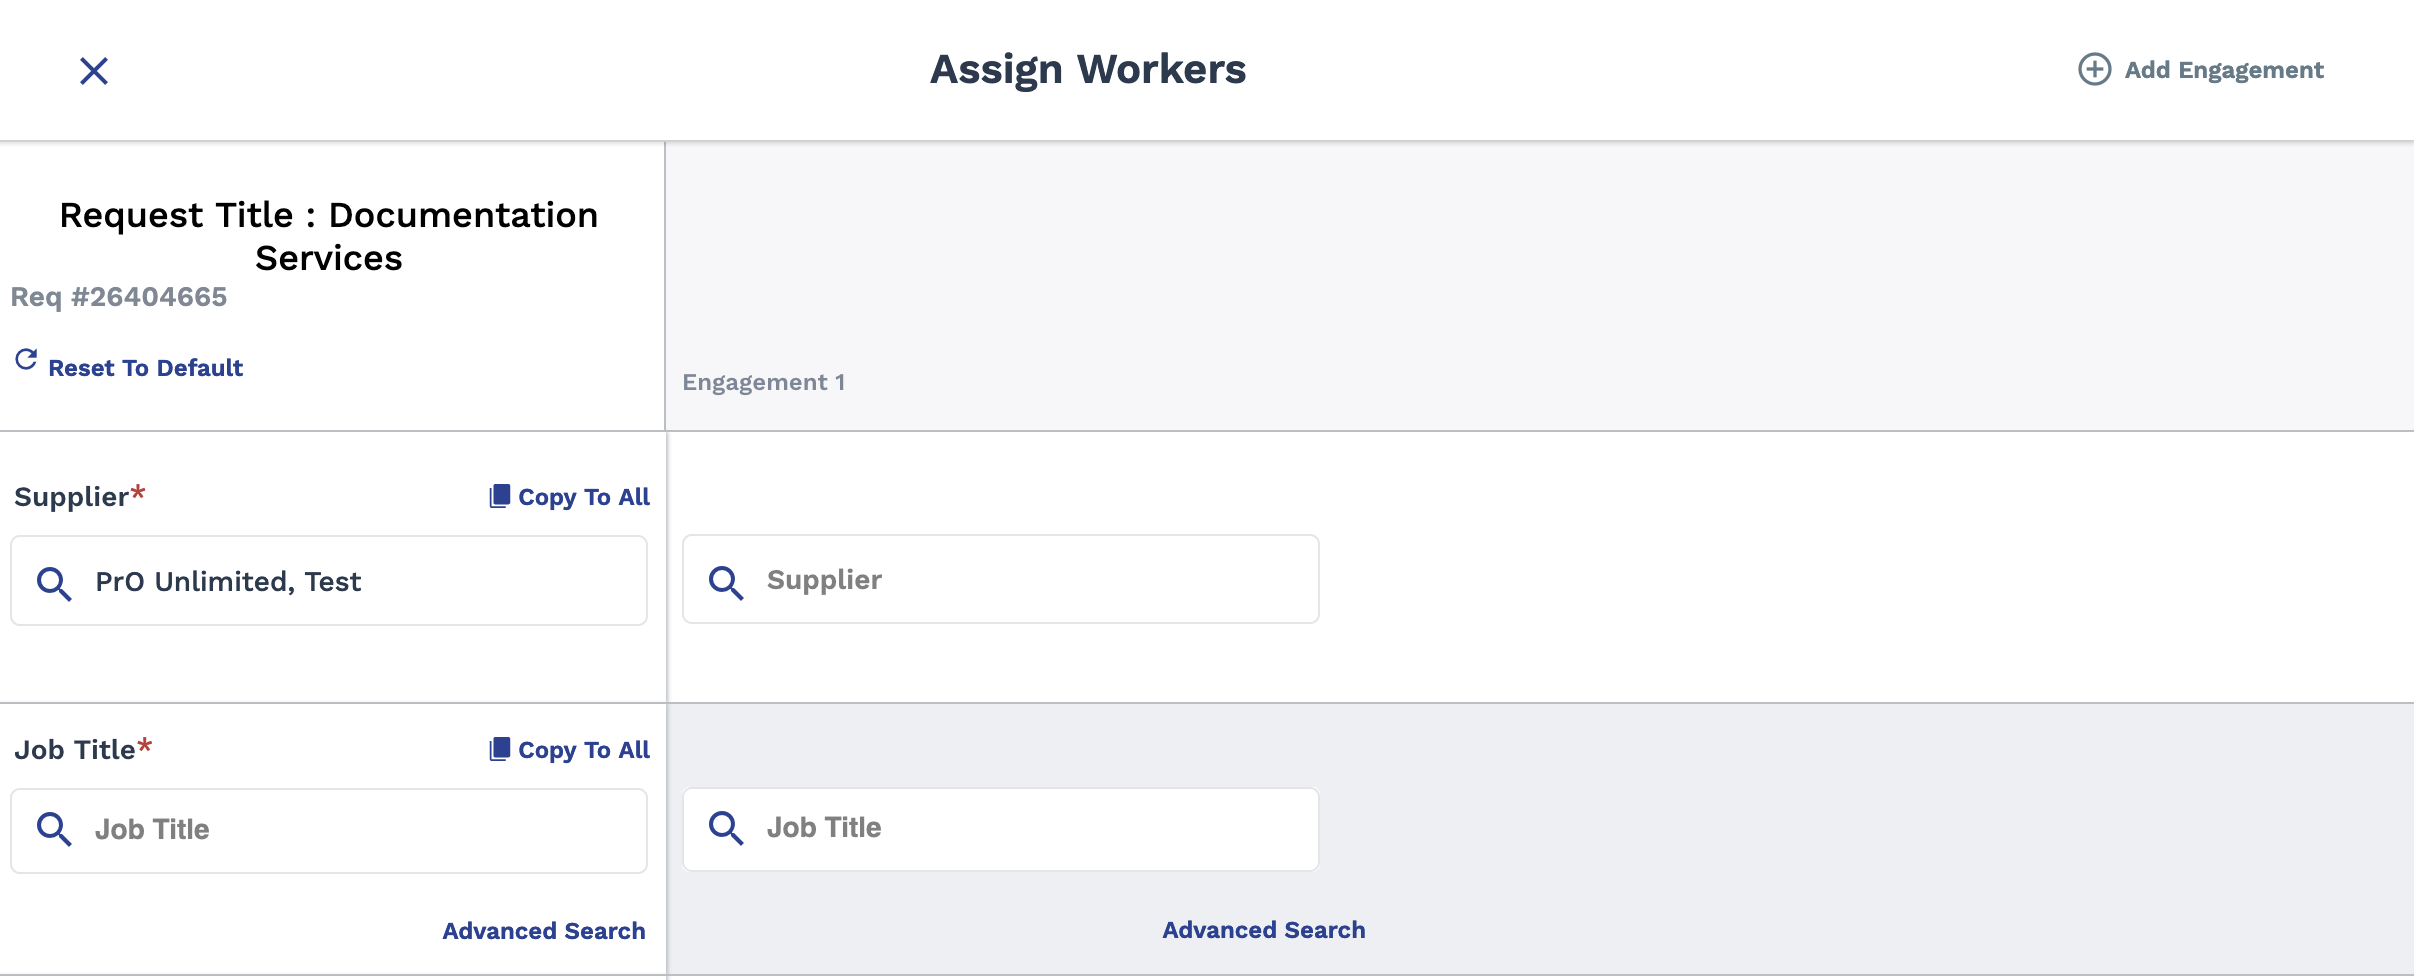 The Worker Grid displays a general detail column on the left that is pre-populated with request information. The right side of the grid displays a column for each position in the request. Enter information in the following fields:
- Supplier
- Job Title
- Worker First Name
- Worker Last Name
- (Worker) Legal First Name
- (Worker) Legal Last Name
- Worker Email Address
- Phone Number
- Start Date
- Estimated End Date
- Other Client Location
- Worker Offsite Country
- Worker Offsite State
- Worker Offsite City
- Worker Offsite Address
- Worker Offsite Postal Code
- Currency
- Bill Rate
- Company Name
- Custom Fields
Tip: If your workers all use the same values, you can save time by adding the value to the left column and then clicking . This adds the value to all worker columns.
Note that this button does not appear for all rows.
. This adds the value to all worker columns.
Note that this button does not appear for all rows. -
Click
 .
The worker/s now appear in the Sourcing section of the request with an associated engagement number. They also appear on the Engagements page.
.
The worker/s now appear in the Sourcing section of the request with an associated engagement number. They also appear on the Engagements page.
See Engagements Page