Quick Add Approver
Note:
A red asterisk (*) indicates a required field.
- Navigate to the Dashboard page of the MSP view.
-
Click Add Approver.
A popup appears for you to input data.
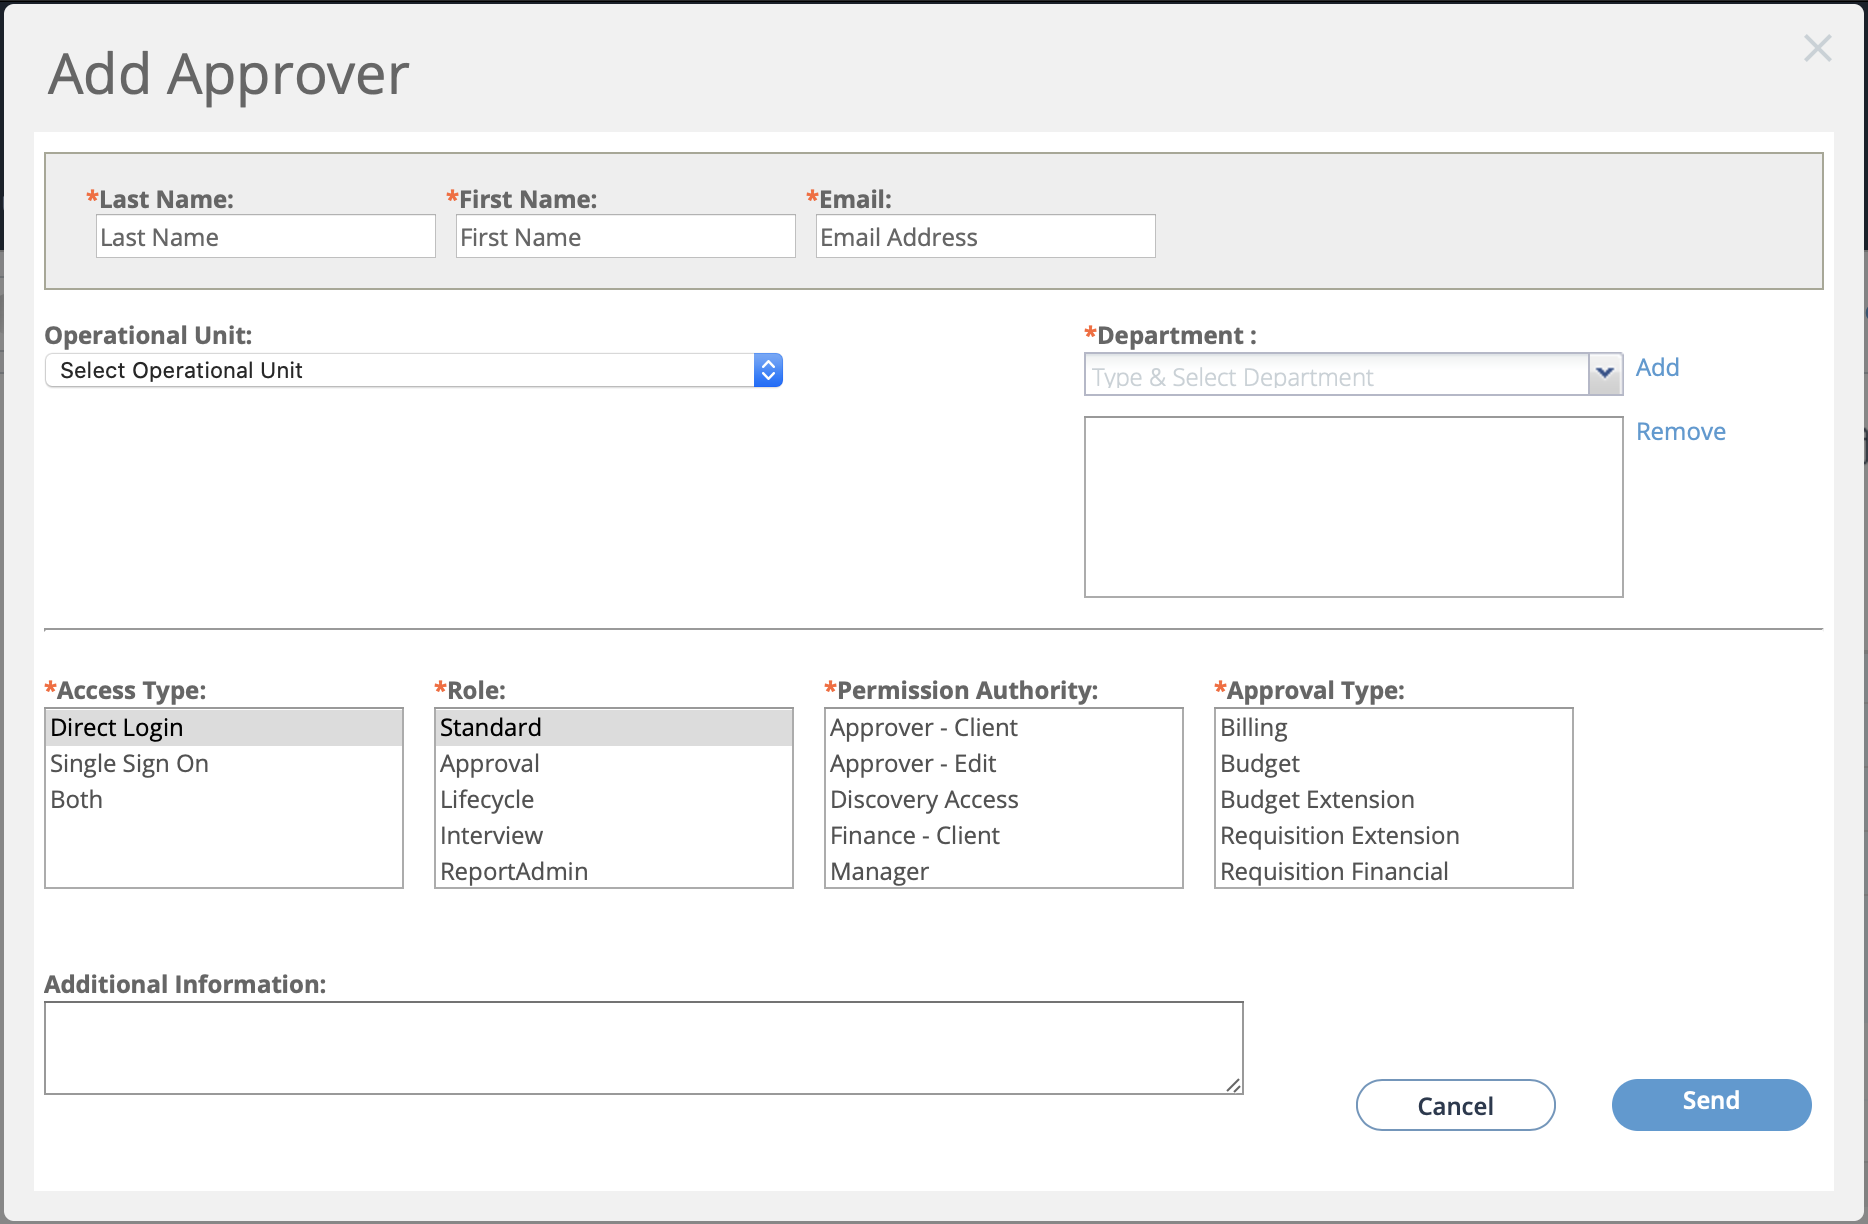
- In the Last Name field, enter the last name of the approver.
- In the First Name field, enter the first name of the approver.
- In the Email field, enter the email address of the approver.
- From the Operational Unit drop down, select the operational unit for the approver.
-
In the Department field, enter text to search for a
department. From the search results, click the department, and then click
Add.
You can associate the approver with multiple departments by repeating the search and add process.
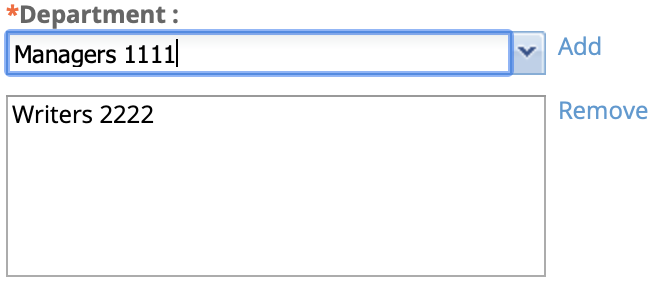
To remove a department, select the department in the text box and click Remove.
-
From the Access Type field, click how the approver gains
access to the application.
Note:You can only select one access method.
-
From the Role field, select the role that the approver
has in the client organization/op unit.
You can add more than one role for a approver. To add multiple roles, hold down the shift key and click each role. You can also add multiple roles to an approver by editing the user record.
-
In the Permission Authority field, select the
permissions to grant the approver.
You can add more than one permission for a approver. To add multiple permissions, hold down the shift key and click each permission. You can also add multiple permissions to an approver by editing the user record.
-
In the Approval Type field, select the types of items
that the approver can approve.
You can add more than one type for a approver. To add multiple types, hold down the shift key and click each type.
- Optionally, in the Additional Information field, enter free text comments for the new manager record.
-
Click
 .
.