Add Project Billing
- Navigate to the Billing page in the Supplier view.
- In the top ribbon, click Add New.
- In , select Suppliers.
- In the section, select the supplier organization to create the billing for.
-
In the Add New Billing : Requisition Selection, locate
the requisition and click Select in the right side of the
list.
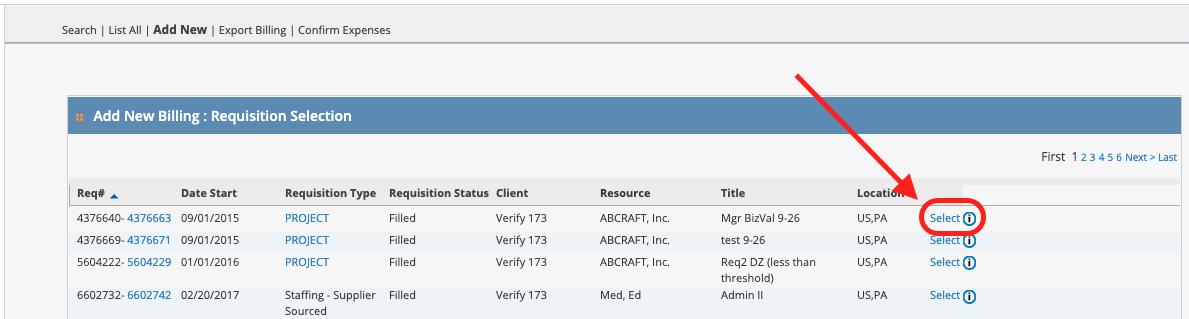 Note:Selecting any of the other links (Req#, Requisition Type, and so on) navigates you away from the billing configuration.
 - In drop down, select Project.
- Click Submit.
-
In the detail list, configure your milestones, materials, or position billing
information. If an expense or custom field is required, ensure to complete
required fields.
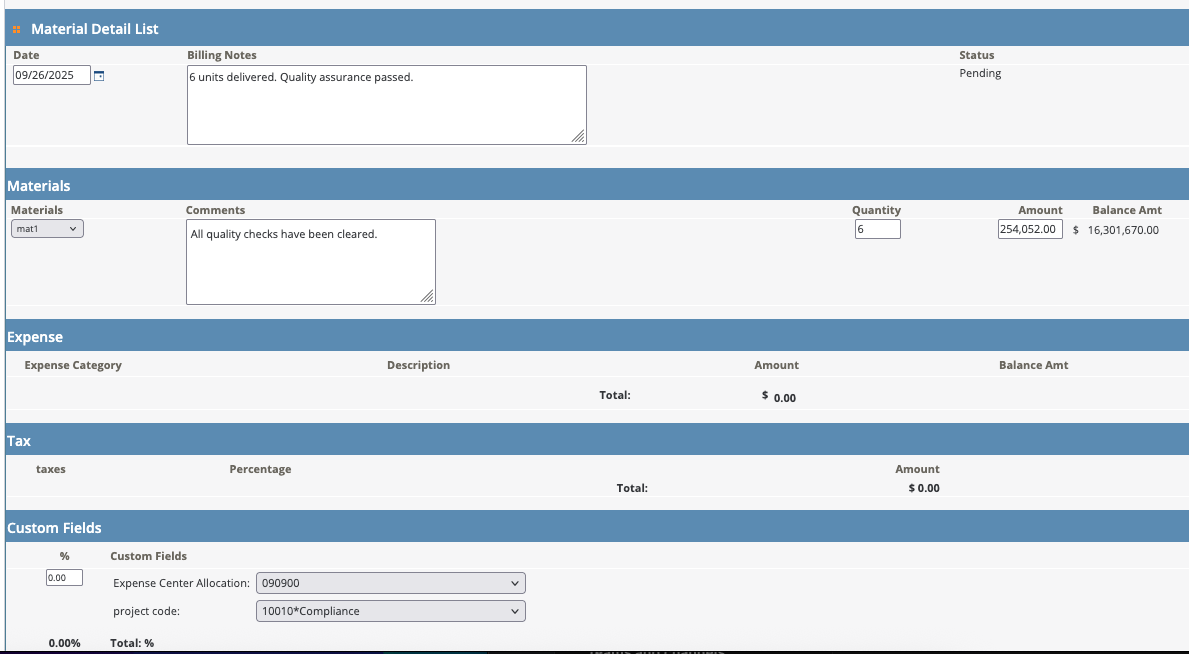
- Milestone - Based on a flat fee defined in the project quote.
- Material - based on a flat unit price for material cost defined in the project quote.
- Position - Based on one or more positions defined in the project quote. The hourly rate is multiplied by total number of hours (units) entered for the position. You must select a defined position and the worker for that position when entering this billing type.
- For each billing type, enter the date of the billing.
- In the Billing Notes field, enter text for your note.
-
Select Add New.
This expands the section where you enter the billing item details.
-
From the type drop down, select the billing item type.
Note:Some items only have one defined type.
- Enter the amount billed for.
-
Optionally, if the billing has expenses, click Add New
in the Expenses section. Configure the following
fields:
- Type - Use the drop down to select the type.
- Description - Enter a text description.
- Amount - Enter the amount of the expense.
Note:The Balance Amount reflects any expenses added to a billing item. -
Optionally, if a project is using billing codes/allocations, enter then in the
Custom Fields section. You can add more than one
code/allocation to the billing.
Note:Ensure that the Total Percentage for all entered codes/allocations equals 100.
- Additionally, upload any required attachments by clicking Attachments at the bottom of the configuration screen.
- Click Save.