Create a Payroll Request
Note:
A red asterisk (*) indicates a required field.
-
Click
 .
.
- Optional: If configured, select the operational unit for the payroll request.
-
On the Create Request page, click the
Payroll tile.
-
In the Job Description & Worker section, in the
Job Title, enter the job title.
The application automatically suggests job titles that are defined in the client organization, and are linked to a supplier in the supplier contract.
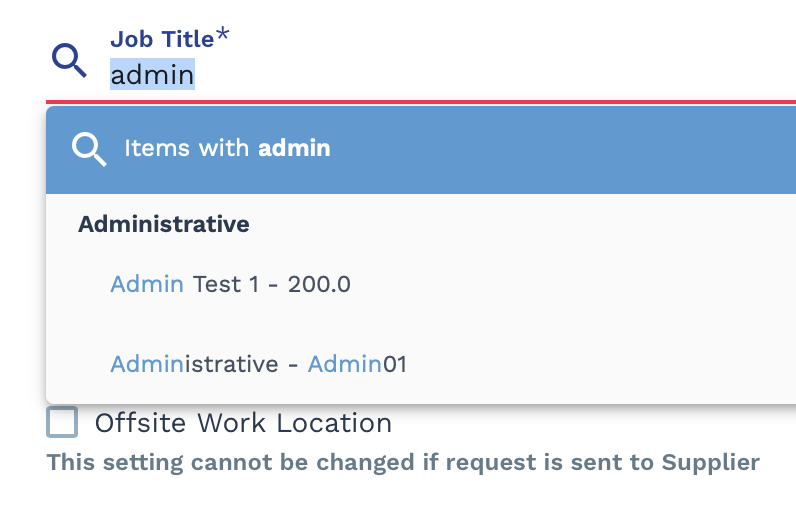
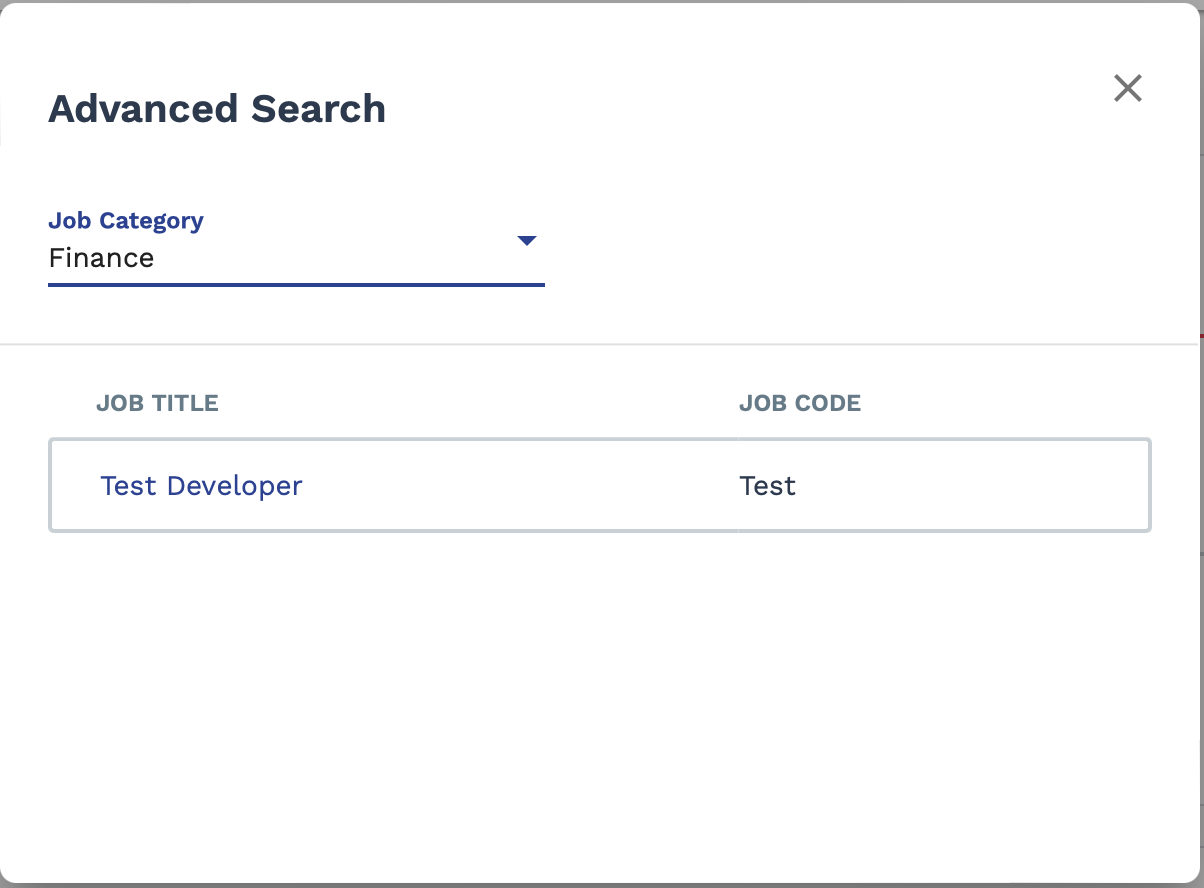
You can also click Advanced to search by category. The search pop up allows you to search by a category. Job Titles for each category can be clicked to populate the Job Title field.
-
In the Location field, enter the location where the job
is performed.
The application automatically suggests defined locations.Job locations are defined for a client organization prior to request creation. If the job site is not a defined location, you can specify the details by a combination of country, state/province, and city. To enter this information, select the Work Completed Offsite check box, and using the drop downs, select the location details.
-
Optional: You can modify the defined job description if you have the correct
permissions. To modify the fields, click the
 icon.
The permission required to edit the Job Description fields is defined by the Job Description Edit Access for MSP and Manager setting. For more information about this setting, see Client Settings.
icon.
The permission required to edit the Job Description fields is defined by the Job Description Edit Access for MSP and Manager setting. For more information about this setting, see Client Settings. -
In the worker section, add the worker details.
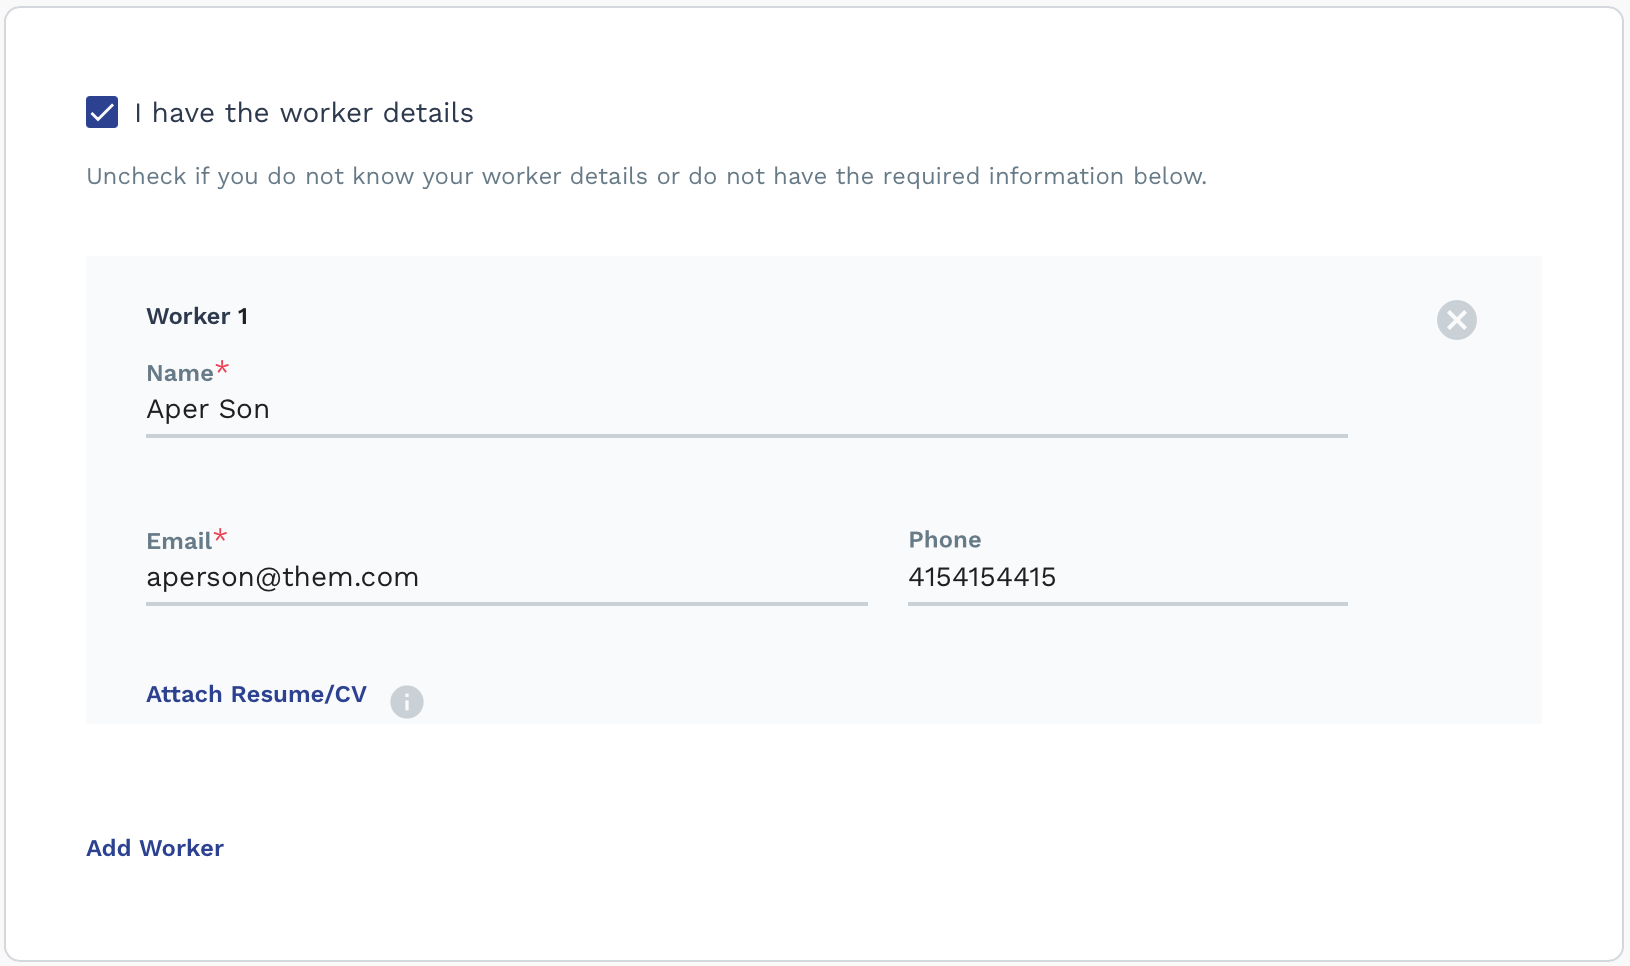 Enter the following information:
- Name
- Email - Contact email address for the worker
- Phone - Worker's contact telephone number
- Pay Rate - Suggested worker's pay rate. The pay rate is finalized in the engagement financials.
This information is sent to the payroll supplier/vendor.Note:Worker details are not required to submit a payroll request. The request can still be submitted due to a business reason (for example, to start and complete an approval routing workflow in a timely manner). An MSP user can add the worker to the request by completing the steps in Add a Worker Record to a Payroll Request. - Click Attach Resume/CV to add a resume/cover letter for the worker. From your file browser, select the file.
- Optional: If the request requires multiple workers, click Add Worker and enter the worker details.
-
Click
 .
.
-
On the Details page, in the Start
Date field, enter the start date for the job.
Note:This is the earliest date that a worker can enter time. This date is different from the date that the request is filled, converting it to an engagement.You can also click the calendar icon to open a calendar pop up that allows you to select the date.
-
In the End Date field, enter the end date for the
job.
Note:This is the last date that a worker can enter time.You can also click the calendar icon to open a calendar pop up that allows you to select the date.Note:Worker length of stay must conform to the worker tenure setting in the client organization configuration (). If the tenure exceeds this number of days for both requests and revisions, a warning is given. For more information about this setting, see Approval Settings.
-
In the Total Positions field, enter the number of
workers required for the job.
This field defaults to '1'.
-
In the Time & Expense Approver field, enter the
billing item approver for the job. This is the user in your organization that
approves time cards submitted by workers for the job.
Note:Approvers require the correct permissions for this role.This field defaults to the client manager filling out the request. You can enter and select another client manager if they have the correct permissions. For more information about the different client manager permissions, see Client User Permissions.
- In the Schedule section, use Full Time or Part Time button to define the engagement as full time or part time.
-
In the Hours Per Week field, enter the number of hours a
week required by the engagement.
If you select Part Time, enter values in the Hours Per Day and Hours Per Week fields. Optionally, you can select the required days per week from the drop down.The number of hours a week for a job is used to determine eligibility for a worker (overtime, thresholds, and so on) if configured for the client organization.If your client organization is using piece or multiple rates, the Full Time/Part time selector is disabled.
- Click the Add Schedule Notes link to open a text field for adding notes to the job schedule.
-
In the Reason for Hire section, from the
Reason drop down, select the hiring reason.
You can add reasons for a hire in the client organization's configuration. For more information about adding this task, see Add a Reason.
-
In the Financials section, from the
Currency drop down, select the currency
(denomination) for the request.
This setting determines how the financial values for the request are calculated. These values include the rates of pay for a worker, and the denomination of the values generated in reporting. The Total Estimate value at the bottom of the Financials section displays the calculated value in the selected currency.Note:Changing this value from one currency to another does not recalculate any financial values previously entered.
-
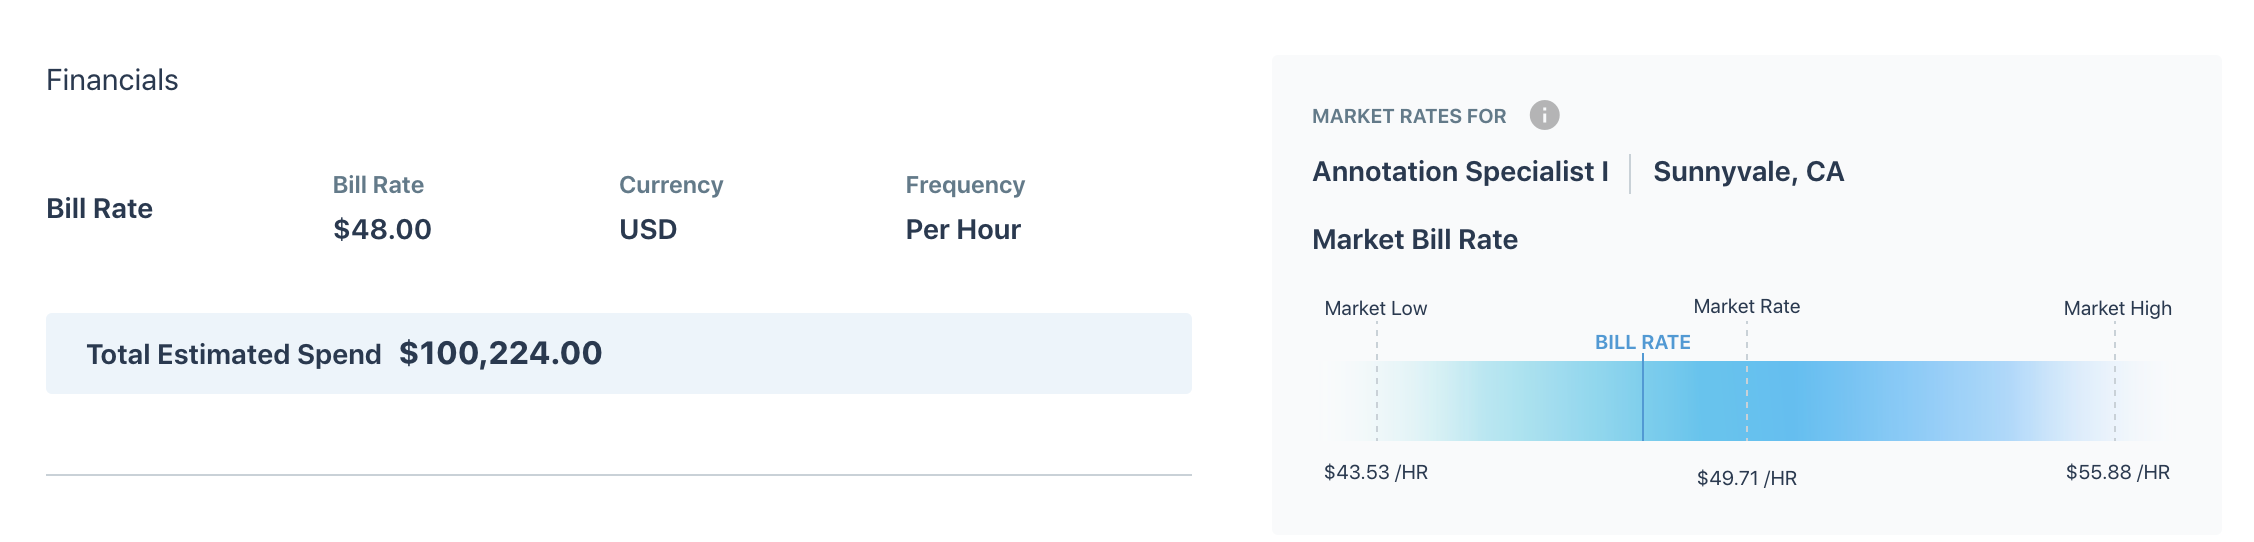
In the Bill Rate field, enter the job bill rate.
If you have the Market Rate Module activated, the market low rate, the proposed rate, and the market high rate is displayed. This can be either the bill rate for the job title, or the pay rate for the job title, depending on the module configuration.
 Note:If you require that the client manager only has the ability to enter a pay rate, you can disable editing of the Bill Rate field (). For more information about this setting, see Manager Settings.
 -
Optional: If enabled, you can click Show Advanced
Calculations to input values to further calculate the bill
rate.
These fields are used to calculate any additional funding and include that funding for approval. For more information about these fields, see Additional Cost Estimation Fields.Advanced calculations are enabled in the client organization's configuration. For more information about this setting, see Client Settings.
-
In the Select Department section, from the
Department drop down, select the department for the
engagement.
Only departments that are assigned to the Time & Expense Approver display in the drop down. You can configure the client organization to allow client managers to add departments that can be selected in this drop down. For more information about this setting, see Manager Settings.
- In the Budget section, from the drop down, select a budget to associate the job with.
-
Click .
-
Optional: On the Additional Info page, in the
Email Alerts section, click
 to add additional contacts for email alerts.
Note:This page can be hidden from a client manager with the Hide Additional Information Page During Staffing Req Create setting. For more information about this setting, see Manager Settings.
to add additional contacts for email alerts.
Note:This page can be hidden from a client manager with the Hide Additional Information Page During Staffing Req Create setting. For more information about this setting, see Manager Settings. - Optional: In the Attach Additional Files section, click Attach File to add additional files/documentation to the request. Choose your file from your file browser.
-
Click .
- On the Review & Submit page, review the request details and edit if required.
-
Click
 .
Note:If a client organization is using approval routing for requests, then the submitted request nigh be routed to another manager or an MSP before the request can be filled.
.
Note:If a client organization is using approval routing for requests, then the submitted request nigh be routed to another manager or an MSP before the request can be filled.