Create a Request
Note:
If you are creating a payroll
request, see Create a Payroll Request.
- Navigate to the Dashboard in the Supplier view.
- Click Requisition.
- From the Client drop down, select the client to create the request for.
-
In the Manager / Email field, enter the client (hiring)
manager's name or email. The application automatically suggests manager names
based on the text that you enter.
The client manager is notified when the request is submitted.
- From the Operational Unit drop down, select the operational unit for the request.
- From the helper section, click the radio button for the type of worker required.
-
Click
 .
.
- On the Description page, from the Reason drop down, select the reason for the request.
- If enabled, in the Reason Detail field, add text for additional explanation for the reason.
-
From the Manager field, select the client manager for
the request. This field automatically populates with the manager that you enter
in the Manager / Email field.
You can change this field from the client manager that you notify. The client manager for the request is the hiring manager, and is responsible for approving billing items.
-
From the Department drop down, select the
department/cost center for the job.
If you do not see a department in the drop down, you can click Add New, and search for configured departments.
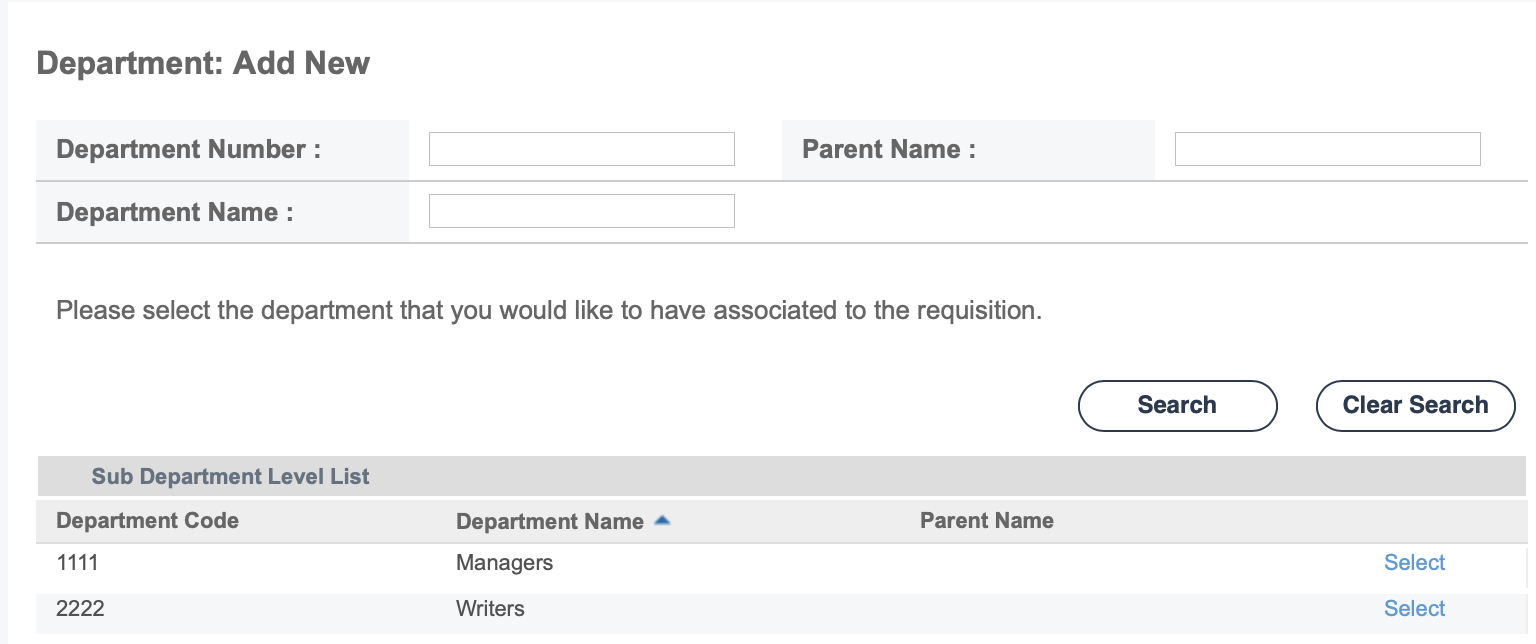
You can search by department number, department name, parent department name, or any combination of values. After entering search parameters, click
 . From the search results, add your department
to the request by clicking Select in the row for the
department.
. From the search results, add your department
to the request by clicking Select in the row for the
department. -
From the Job Category drop down, select the job
category.
Job categories are configured for the client organization based on the request/engagement types defined in the contract. You can only add requests for jobs that exist at the client organization level.
-
From the Job Code drop down, select the job code
associated with the job category. This selection automatically populates the
duties, skills, and education requirements fields. You can modify these fields
if you have the correct permissions.
Note:You can use the styling palette to format the text.
-
In the Number of Positions field, enter the number of
positions open in the request. The request is considered open until all
positions have an accepted candidate assigned.
Note:This value defaults to '1'.
- Optionally, you can click Attachments, and using the upload pop up, add supporting documents for the request.
-
In the Location section, from the
Country drop down, select the country where the job
is performed. The selection in this field drives the options in the remaining
fields in the Location section.
Note:This selection is used to calculate taxes for billing items.Note:You can edit the location on a request after it is filled. To edit the location, locate the engagement on the Requisition page, scroll to the Location section, then click
 in the header. You can use the drop downs to
select from configured values. You can also use the radio buttons to change
the work location.
in the header. You can use the drop downs to
select from configured values. You can also use the radio buttons to change
the work location. - From the State/Province drop down, select the state or province where the work is performed.
- From the City/Town drop down, select the city or town where the work is performed.
- From the Address drop down, select the address where the work is performed.
- In the Schedule section, in the Start Date field, enter the date that the job starts. This date can be in the future. You can also click the calendar icon to open a calendar pop up that allows you to select the date.
- In the Est. End Date field, enter the estimated date that the job ends. This date can be modified after the job/engagement is filled. You can also click the calendar icon to open a calendar pop up that allows you to select the date.
- In the Hours Per Week field, enter the number of hours per week for the job.
- In the Hours Per Day field, enter the number of hours per day for the job.
- In the Day Per Week field, enter the number of days per week for the job.
- Optionally, in the Schedule Notes field, enter text notes for the schedule.
- In the Financials section, in the Max Rate field, enter the maximum bill rate for the job.
- From the Rate Application drop down, select how the billing rate is applied.
- In the Currency drop down, select the currency that the job financials are denominated in.
- In the Contact Information section, from the MSP Contact drop down, select the MSP associated with the job.
- In the MSP Phone field, enter the contact telephone number for the MSP.
-
Click
 .
Note:You can also click
.
Note:You can also click to save your request configuration as a draft.
You can access this draft later.
to save your request configuration as a draft.
You can access this draft later. -
On the Sourcing : Modify page, select the vendors to
notify of the job. These vendors are able to submit candidates for the job, and
are visible to the client manager.
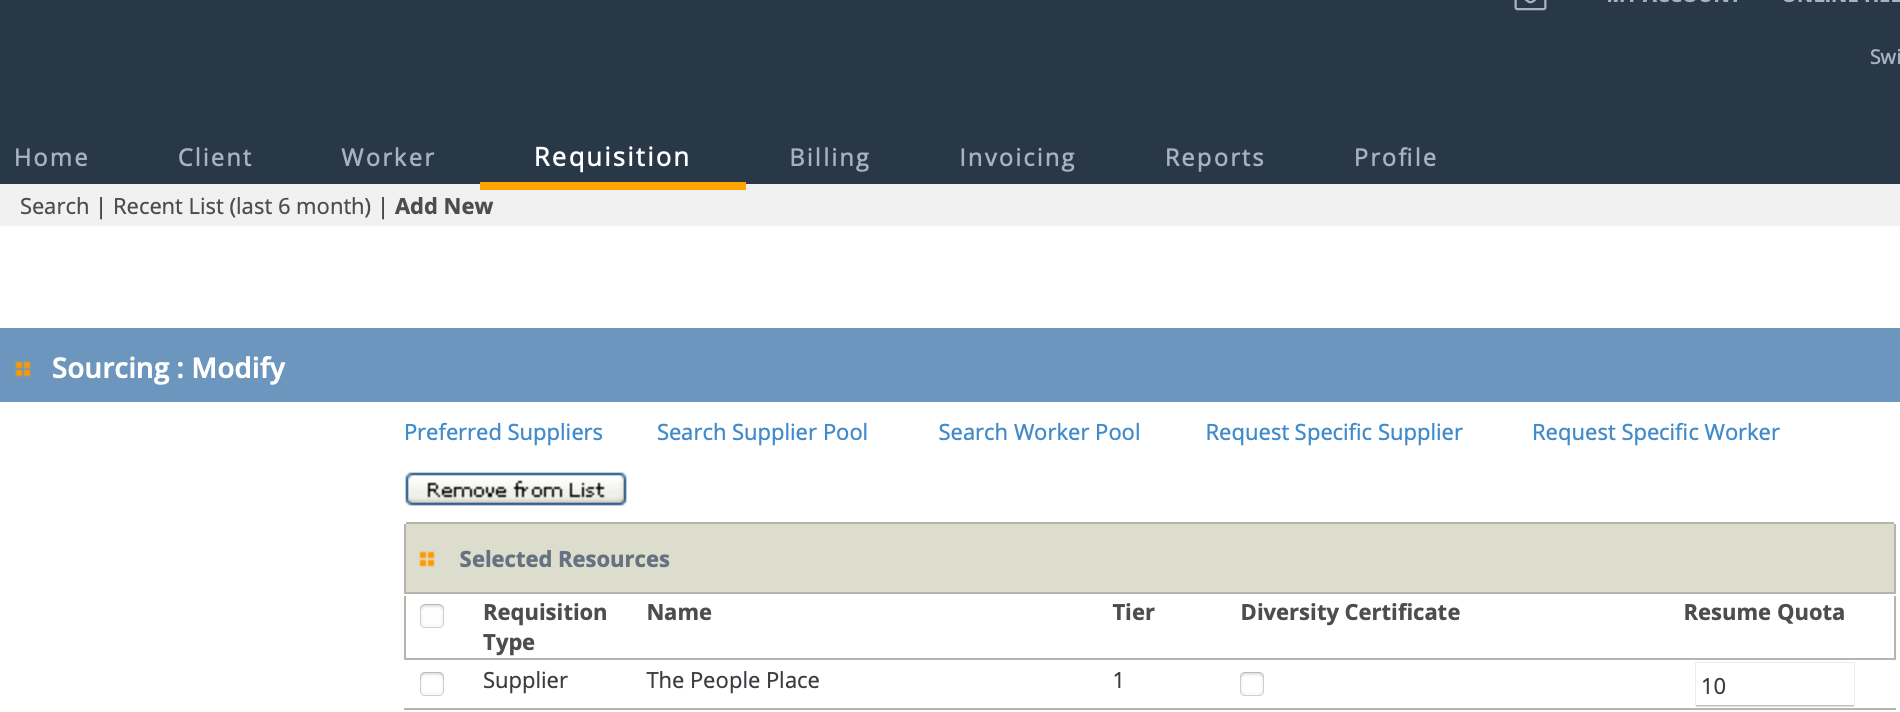 Your supplier organization appears by default. Clicking automatically selects your organization and
submits the request. Additionally, you can use the following options by
clicking the blue text links at the top of the section:
Your supplier organization appears by default. Clicking automatically selects your organization and
submits the request. Additionally, you can use the following options by
clicking the blue text links at the top of the section:- Preferred Suppliers - If you have a list of preferred vendors, click the text, and then from the Results table, select the vendor check box, and then click Add to List.
- Search Supplier Pool - To search for vendors that your organization
is associated with, click the text, and then enter parameters to
define your search.
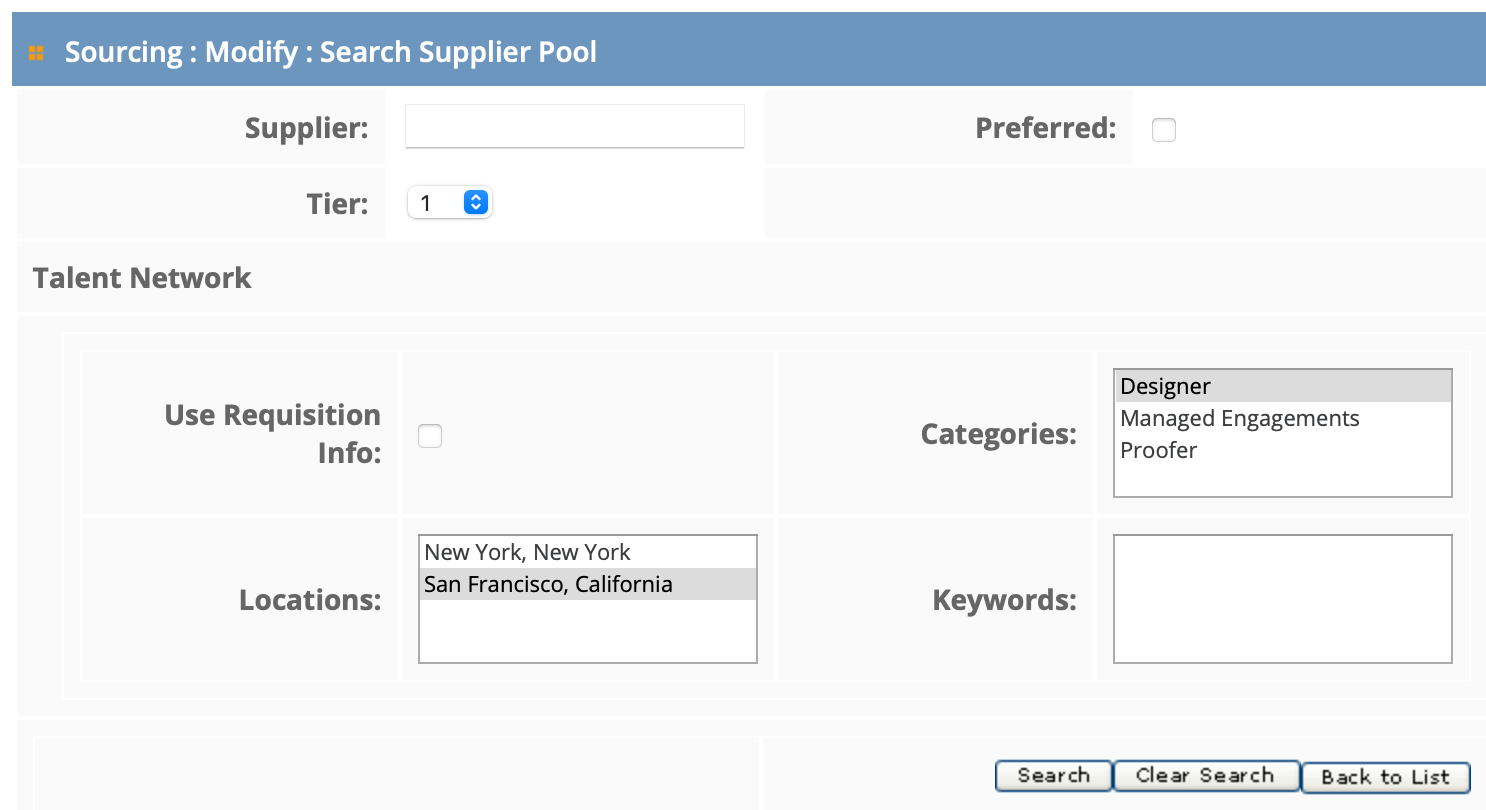
In the Results table, select the check box of the supplier and click Add to List.
- Search Worker Pool - To search for workers in your organization,
click the text, and then enter parameters to define your
search.
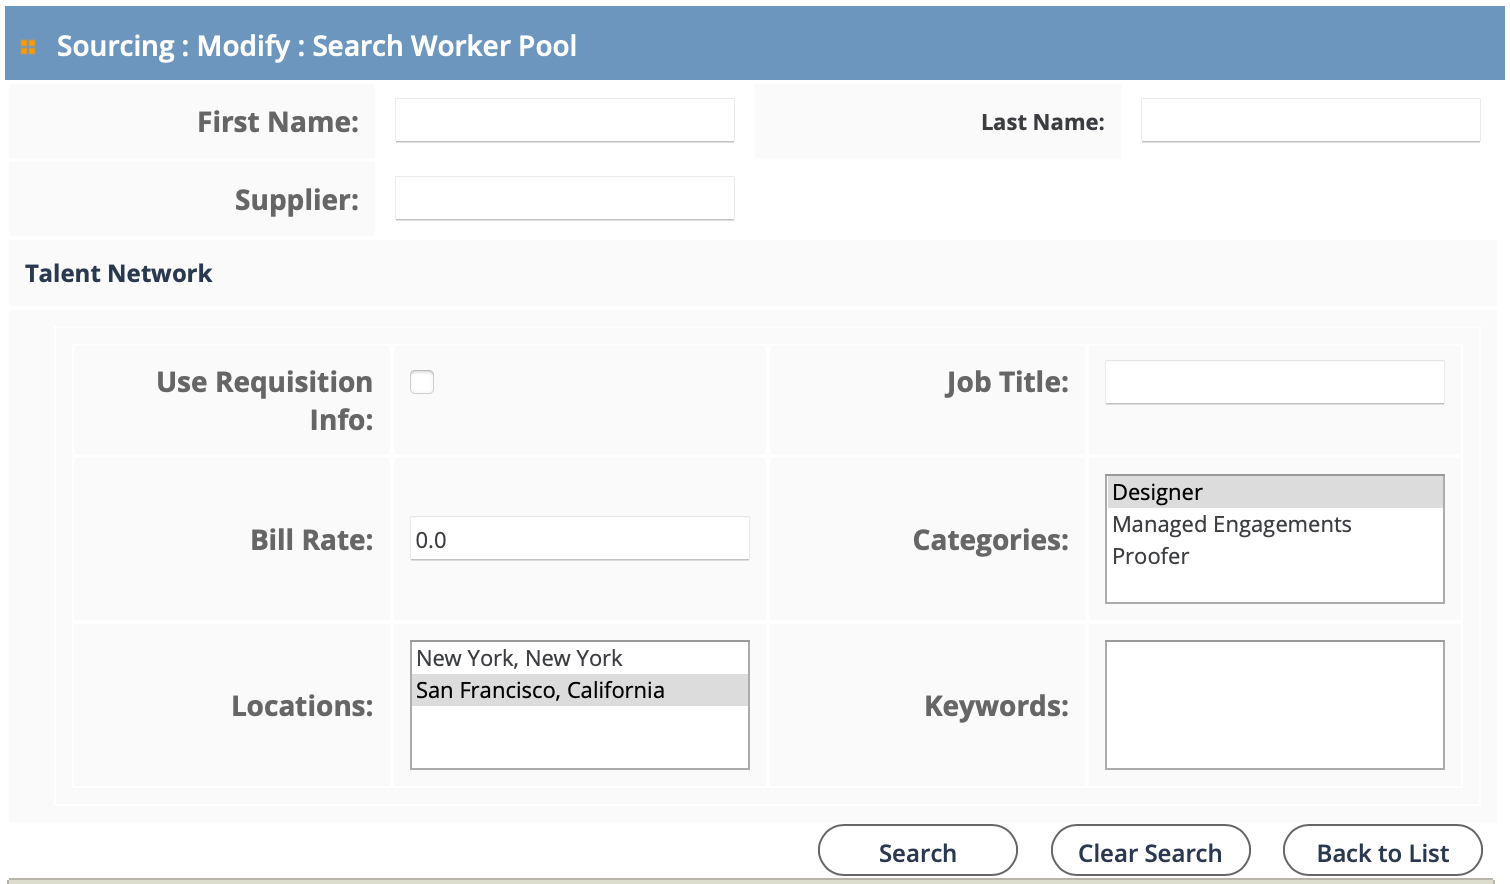
In the Results table. select the check box of the worker to add.
- Request Specific Supplier - To request a specific supplier/vendor
for the request, enter the supplier's name, the supplier's contact
person's name, the contact phone number, and contact email address.
All of this information is required. After configuring
the fields, click
 .
. - Request Specific Worker - To request a specific worker for a request, enter the worker's first name, last name, and email address. This information is used to contact the worker, and is required. You can additionally add the supplier name for the worker, and the worker's telephone number. After you configure these fields, click Add to List.
-
Click .
-
On the Confirmation page, review the request
information, and click
 .
The request is submitted with the request status set to 'Pending Sourcing'. You can click the Resume/Portfolio tab to search for workers in your supplier organization to submit to the client organization. For more information about submitting workers, see Submit a Worker to a Request.
.
The request is submitted with the request status set to 'Pending Sourcing'. You can click the Resume/Portfolio tab to search for workers in your supplier organization to submit to the client organization. For more information about submitting workers, see Submit a Worker to a Request.