Add a Job Category
Note:
If the
client uses job codes, then ensure that the categories you enter match the job code
categories.
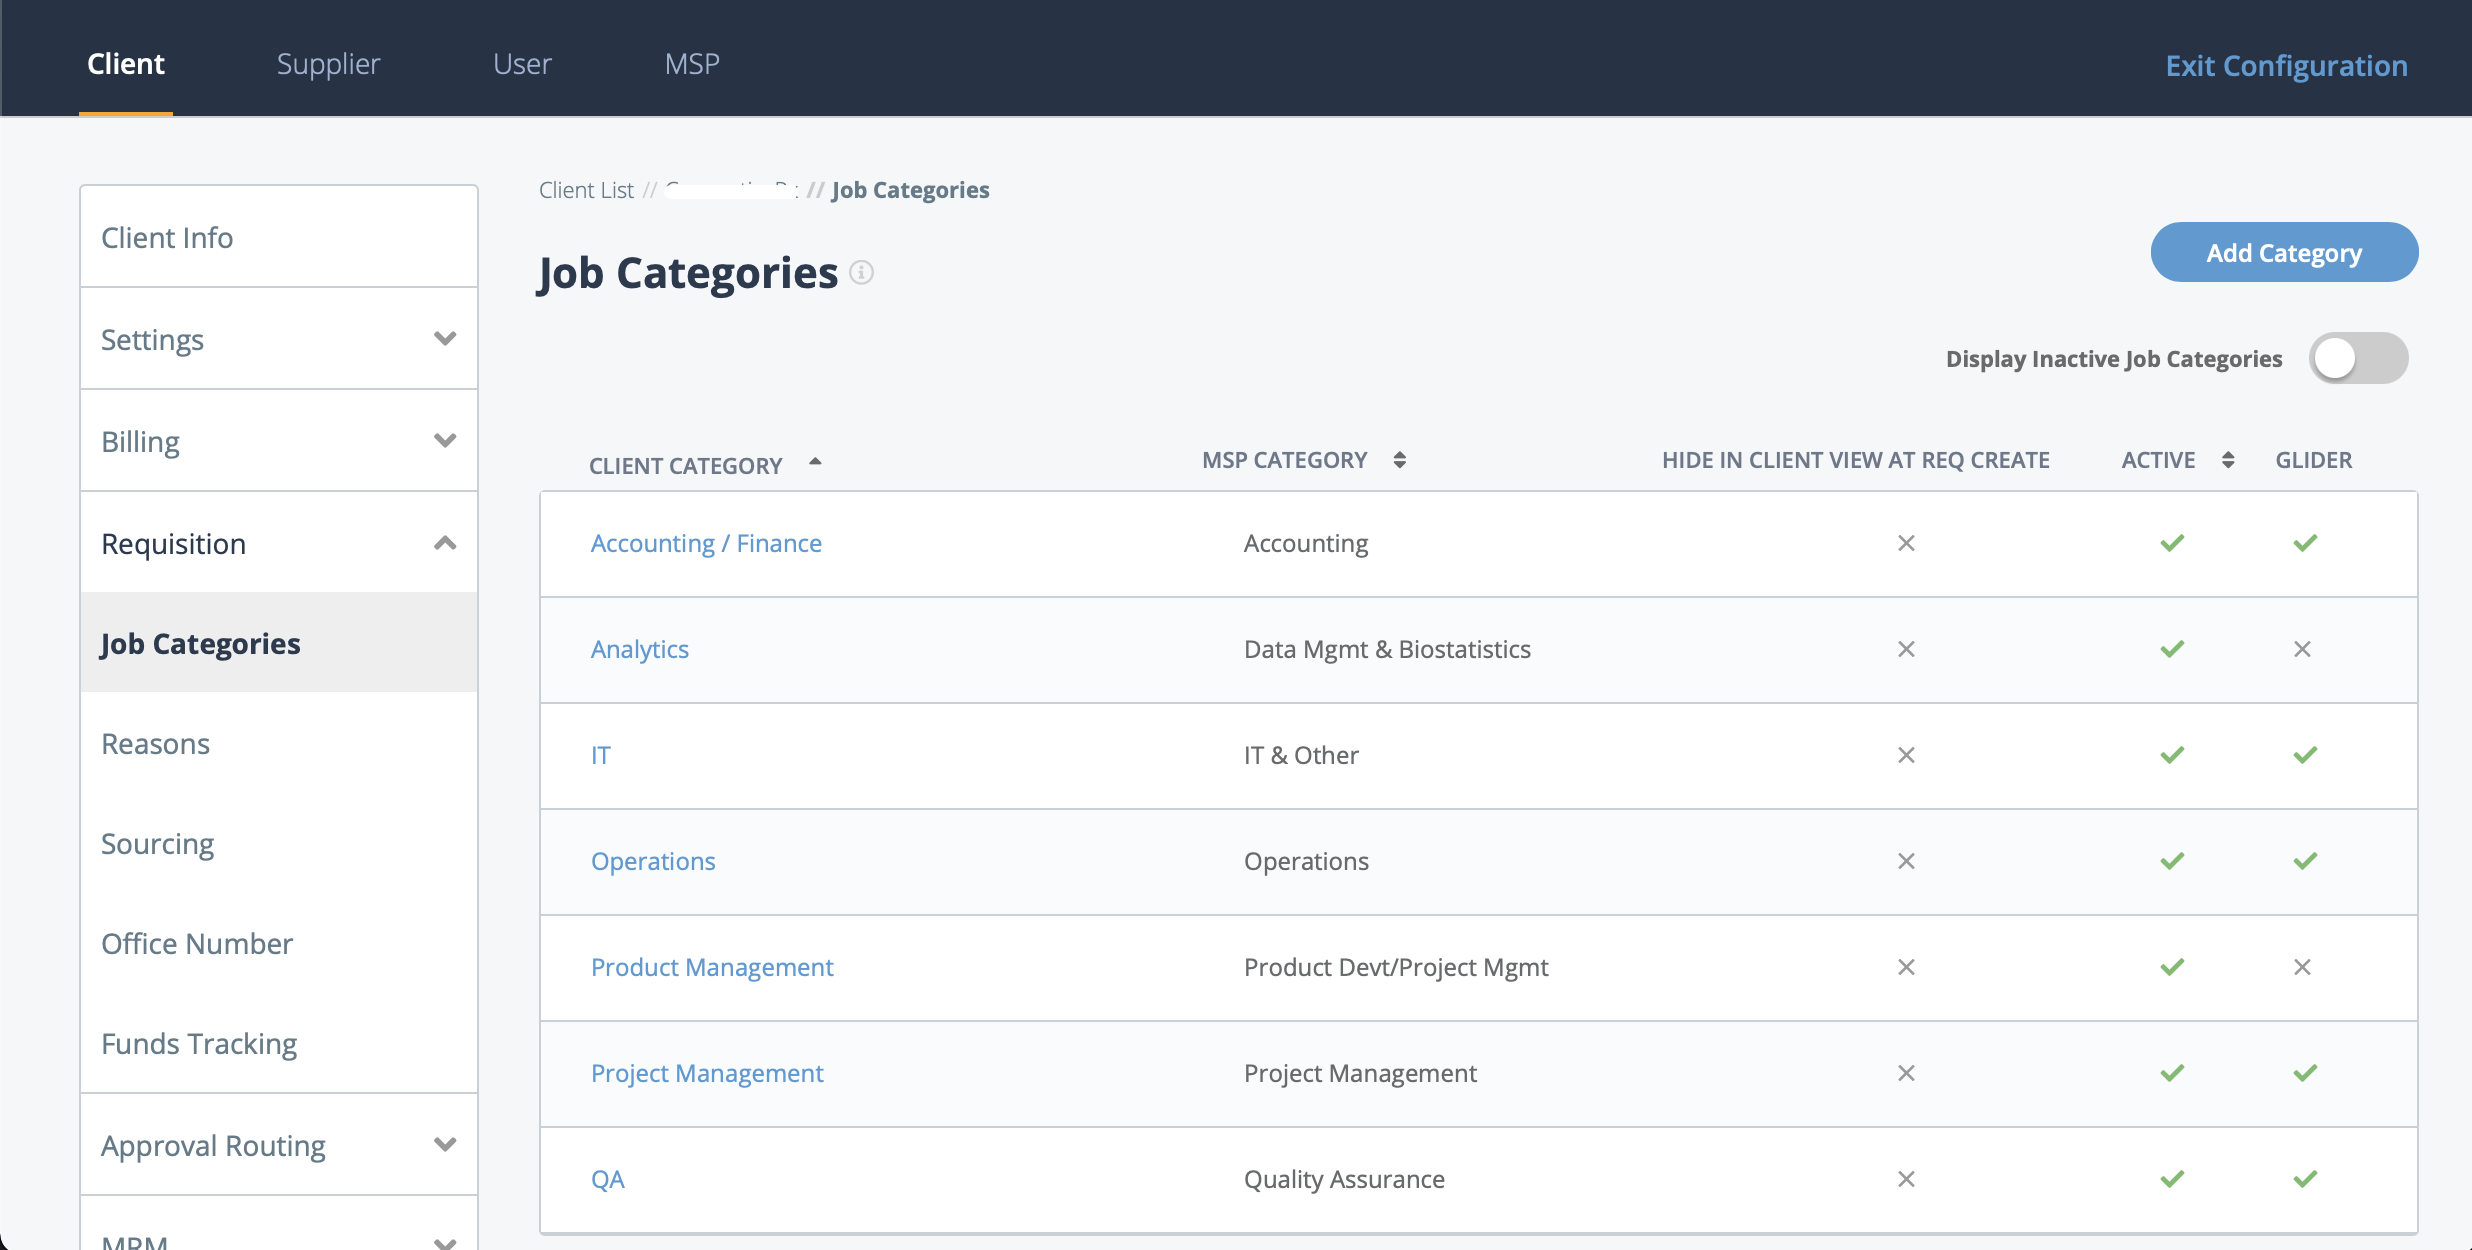
Note:
You can filter the view by active or inactive job categories
using the Display Inactive Categories toggle
switch.
Note:
If your client organization is using the Glider.ai integration,
there is a green check mark in the top level information. The available Glider
assessments that are available to assign candidates interviewing for jobs in the job
category display in the bottom pdf the page. These tests cannot be edited, and the
list cannot be edited.
- Navigate to the Clients page on the Configuration view.
-
Click the link in the NAME column for the client whose
information you want to modify.
The Client Info page appears.
-
Navigate to .
-
Click
 .
.
- In the Client Category text box, enter a name for the job category.
- From the drop down, select the requisition type to enable the job category for.
- From the MSP Category drop down, select the category to display to the MSP.
-
To hide the category when creating a requisition, select the Hide in
Client View at Req Create check box.
This setting is used to control the job category in the client organization. If you activate the category, and it is defined in a supplier contract, a client manager is able to create a requisition for it. In order to make the category visible in reporting, but to not allow client managers to create a requisition with it, use this setting.
- To make the job category available in the client organization, select the Active check box.
-
Optional: If the client organization requires sub-categories, click
Add Sub-Category.
Note:Once you add a sub-category, it cannot be deleted. If you add a sub-category for one job category in a client organization, you must add an equal number of sub-category levels for all job categories in the client organization.
-
Select
 .
.