Create a Standard Invoice
Only users with the MSP Admin or SysAdmin role, or MSPs with the 'Billing', 'Finance', 'Payroll', or 'Payroll Manager' permissions can create invoices using this task.
Note:
If you
are creating an invoice with Pay Supplier billing line items (Billing
Filter='MSP:Supplier'), the line items are separated out during the invoice creation
process.
The standard invoice can be associated with a configured fee. For more information about fee invoice association, see Create a Fee or Rebate Invoice.
- Navigate to the Invoicing page in the MSP view.
-
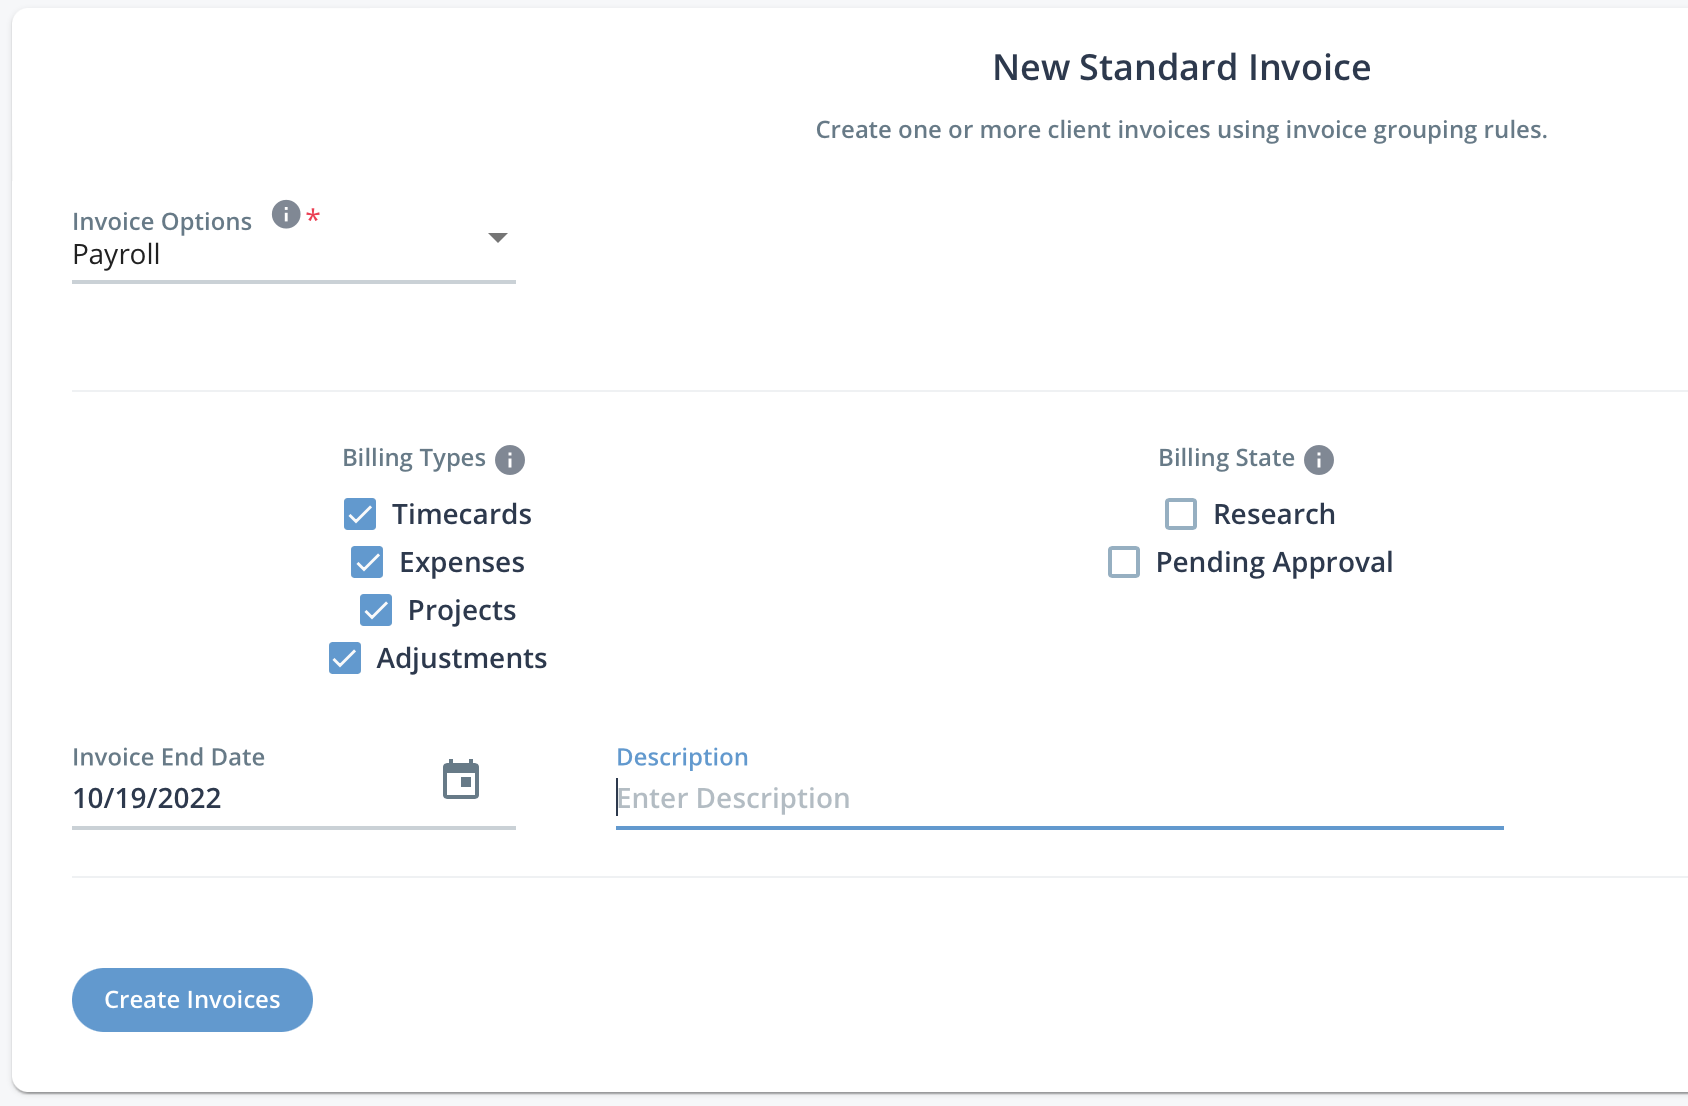
Click the New Standard Invoice button. The create
invoice section opens.
-
From the Invoice Options drop down, select the invoice
option.
Note:You can only select one invoice option per process.
- Select the billing items using the check boxes in the Billing Types section. You can select multiple item types.
-
Select the state for items to include in the Billing
State section. You can select Research
and Pending Approval.
Note:The Pending Approval flag only includes billing which are configured with 'Force Approval'.
-
In the Invoice End Date field, enter the end date. The
process gathers billing items with the invoice option from before this date and
in the correct status. For more information about invoicing statuses, see Invoicing Status.
You can also click the calendar icon to open a calendar pop up that allows you to select the date.
-
Click
 .
The invoice is set to 'Pending Finalization'. You can lock/finalize the invoice using the instructions described in Finalize an Invoice. You can also configure dates of interest and other billing information at the bill level by clicking on an invoice number (or navigate to Billing > Invoicing >
.
The invoice is set to 'Pending Finalization'. You can lock/finalize the invoice using the instructions described in Finalize an Invoice. You can also configure dates of interest and other billing information at the bill level by clicking on an invoice number (or navigate to Billing > Invoicing > ) and adding/editing any required details. See Invoices in the System.