Add Worker to Worker Grid
If a request is in the 'Pending' status because there are
positions that need to be filled (Remaining Positions > 0),
then you can assign a worker using the Worker Grid. The grid provides a
spreadsheet-like experience that allows you to input worker details in cell fields,
or use header columns to populate all fields in the row with a default value (![]() ).
).
Note that a request is closed when all positions are filled. If a worker is removed from a request (Change Status Reason = 'Closed') and a replacement is specified, then the request is move to the 'Pending' status, and the number of remaining positions is incremented up but the number of filled engagements that were closed. You must have permission to remove workers. See Change Worker Status.
Adding a worker to a request automatically converts the worker to an engagement unless approval routing or onboarding is configured.
- Navigate to the Home page in the Supplier view.
-
Click Requisitions.
You can access request information if the request is in the 'Pending' status. The request appears in the View section in the Home page.
-
On the Requests page, click the
Sourcing tab.
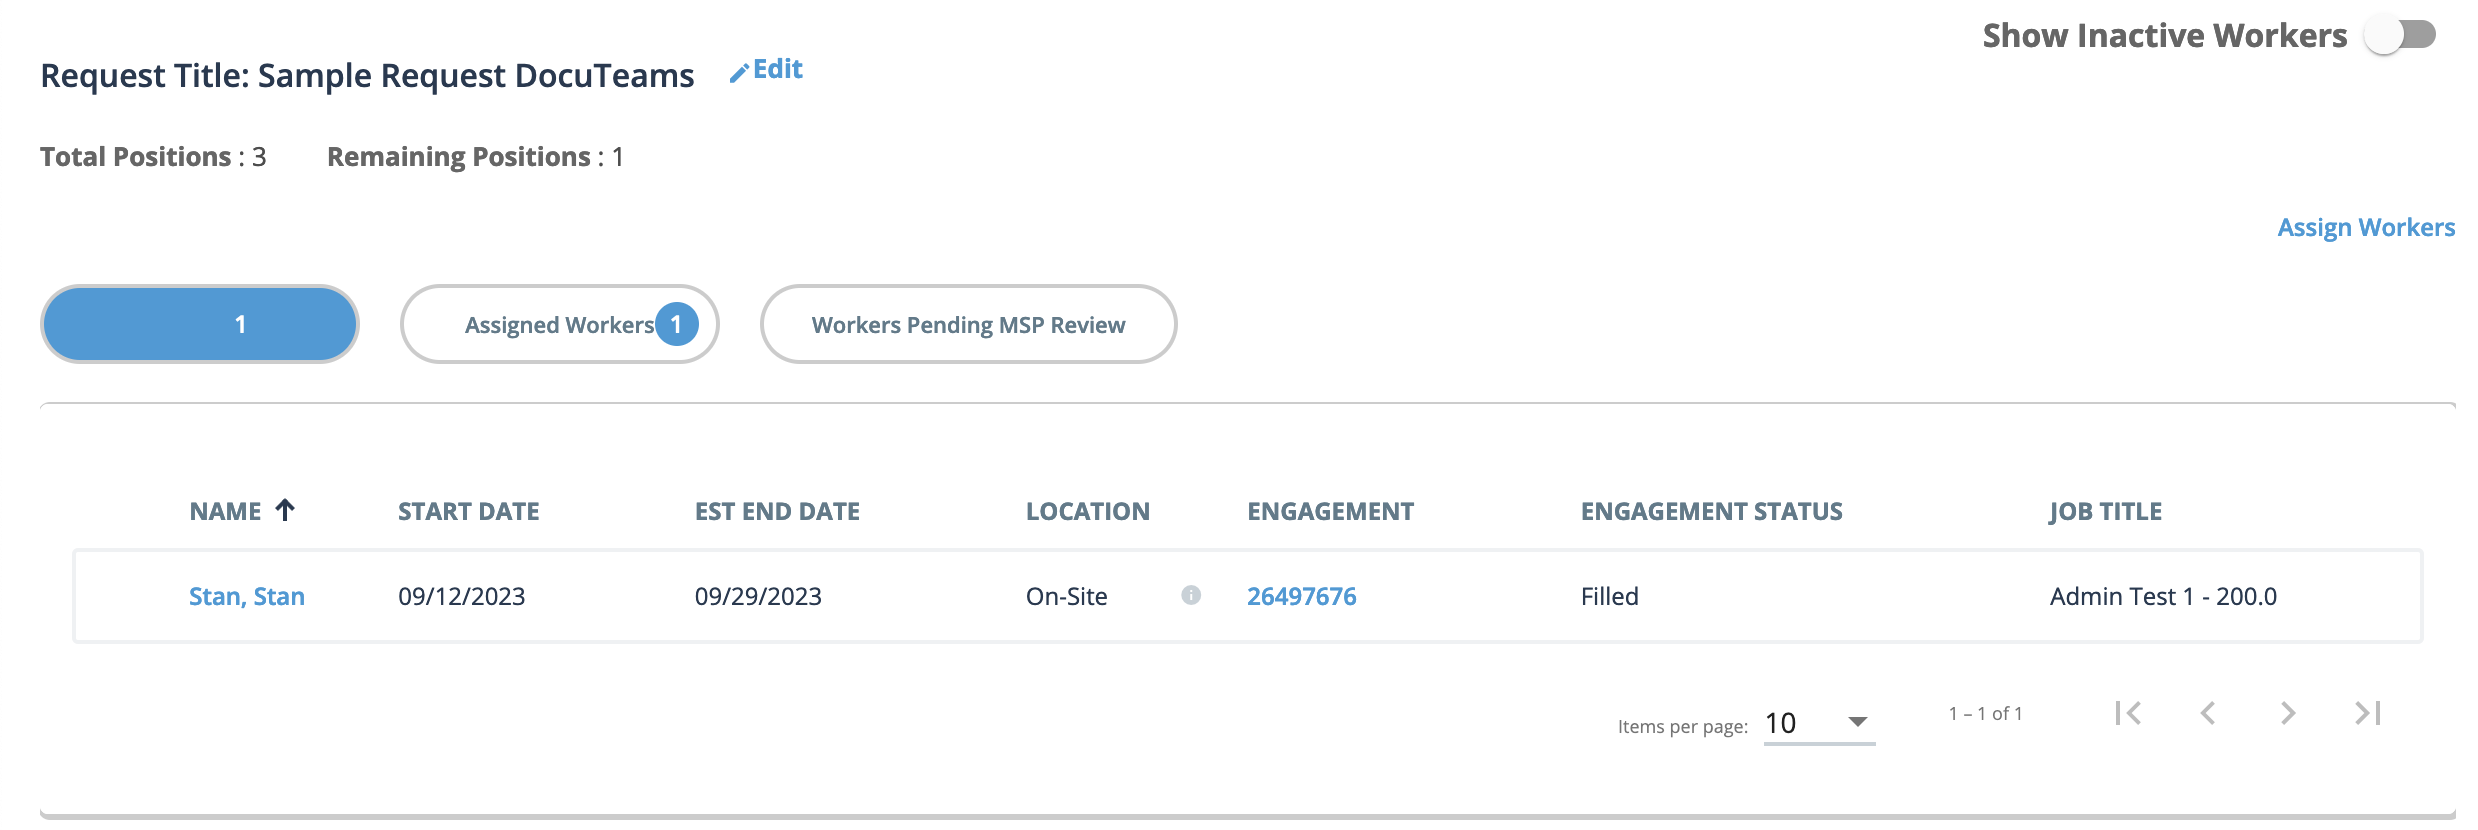
If no workers are assigned, the section appears empty. To add an initial worker, click the Assign Workers tile. If adding workers to a request, click Assign Workers in the upper right corner of the Sourcing section.
You can navigate the view using the buttons to display the following:- ALL - All workers associated with the request. This includes workers that are already added and have been converted to an engagement.
- Assigned Workers - All workers assigned to the request. Each worker is converted to an engagement.
- Workers Pending MSP Review - All workers submitted, but require MSP review.
- Click Assign Workers.
-
Using the Worker Grid, configure the worker's details.
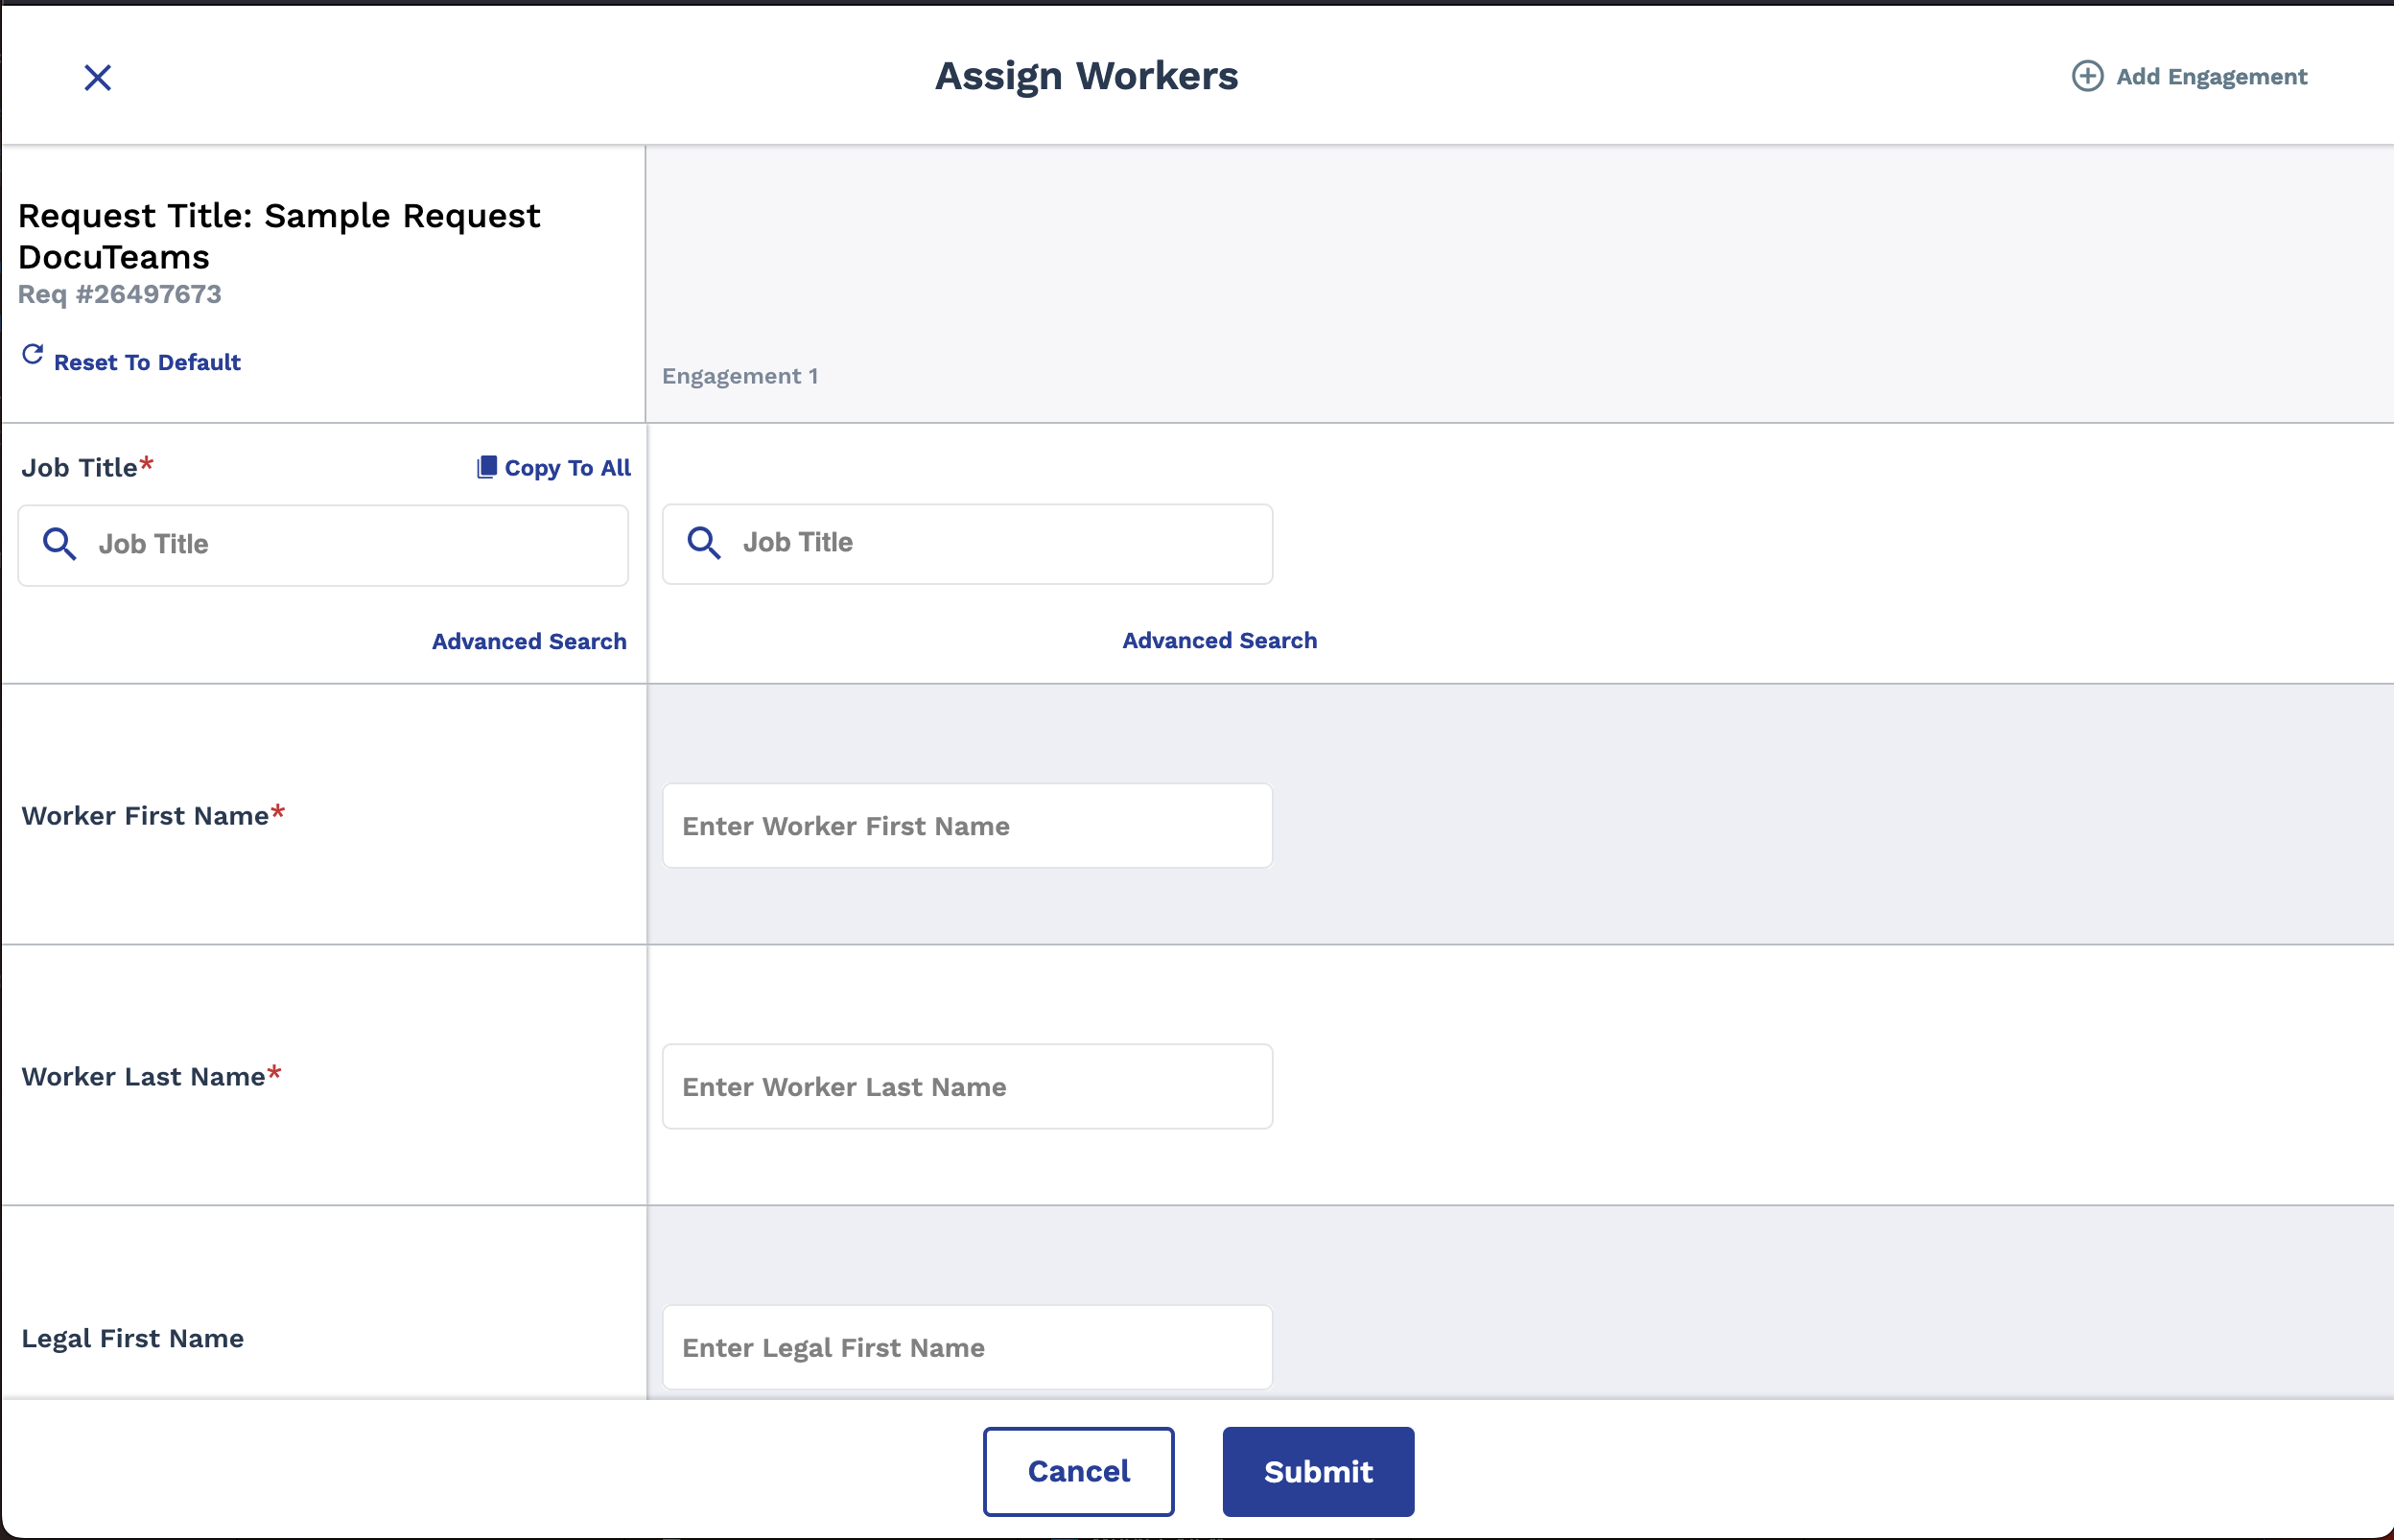 The Worker Grid displays a general detail column on the left that is pre-populated with request information. The right side of the grid displays a column for each position in the request. Enter information in the following fields:
- Job Title
- Worker First Name
- Worker Last Name
- (Worker) Legal First Name
- (Worker) Legal Last Name
- Worker Email Address
- Phone Number
- Start Date
- Estimated End Date
- Other Client Location
- Worker Offsite Country
- Worker Offsite State
- Worker Offsite City
- Worker Offsite Address
- Worker Offsite Postal Code
- Currency
- Bill Rate
- Company Name
- Custom Fields
Tip:If your workers all use the same values, you can save time by adding the value to the left column and then clicking . This adds the value to all worker columns.
Note that this button does not appear for all rows.
. This adds the value to all worker columns.
Note that this button does not appear for all rows. -
Click
 .
The worker/s now appear in the Sourcing section of the request with an associated engagement number. They also appear on the Engagements page.
.
The worker/s now appear in the Sourcing section of the request with an associated engagement number. They also appear on the Engagements page.
See Request Page.