Add Custom Fields
- Navigate to the Configuration page on the MSP view.
- Select on the left navigation menu.
-
In the Custom Fields page, select from following tabs to
access the workflow-specific page to add the custom fields to.
- Billing
- Requisition
- Supplier
- Manager
- Worker
- Department
- Supplier Invoice PaymentNote:Only the Billing and Requisition custom fields are available for an Op Unit. For more information about setting up operational units, see Operational Units.
-
Select
 in the Custom Fields
page.
The Add Field page opens.
in the Custom Fields
page.
The Add Field page opens.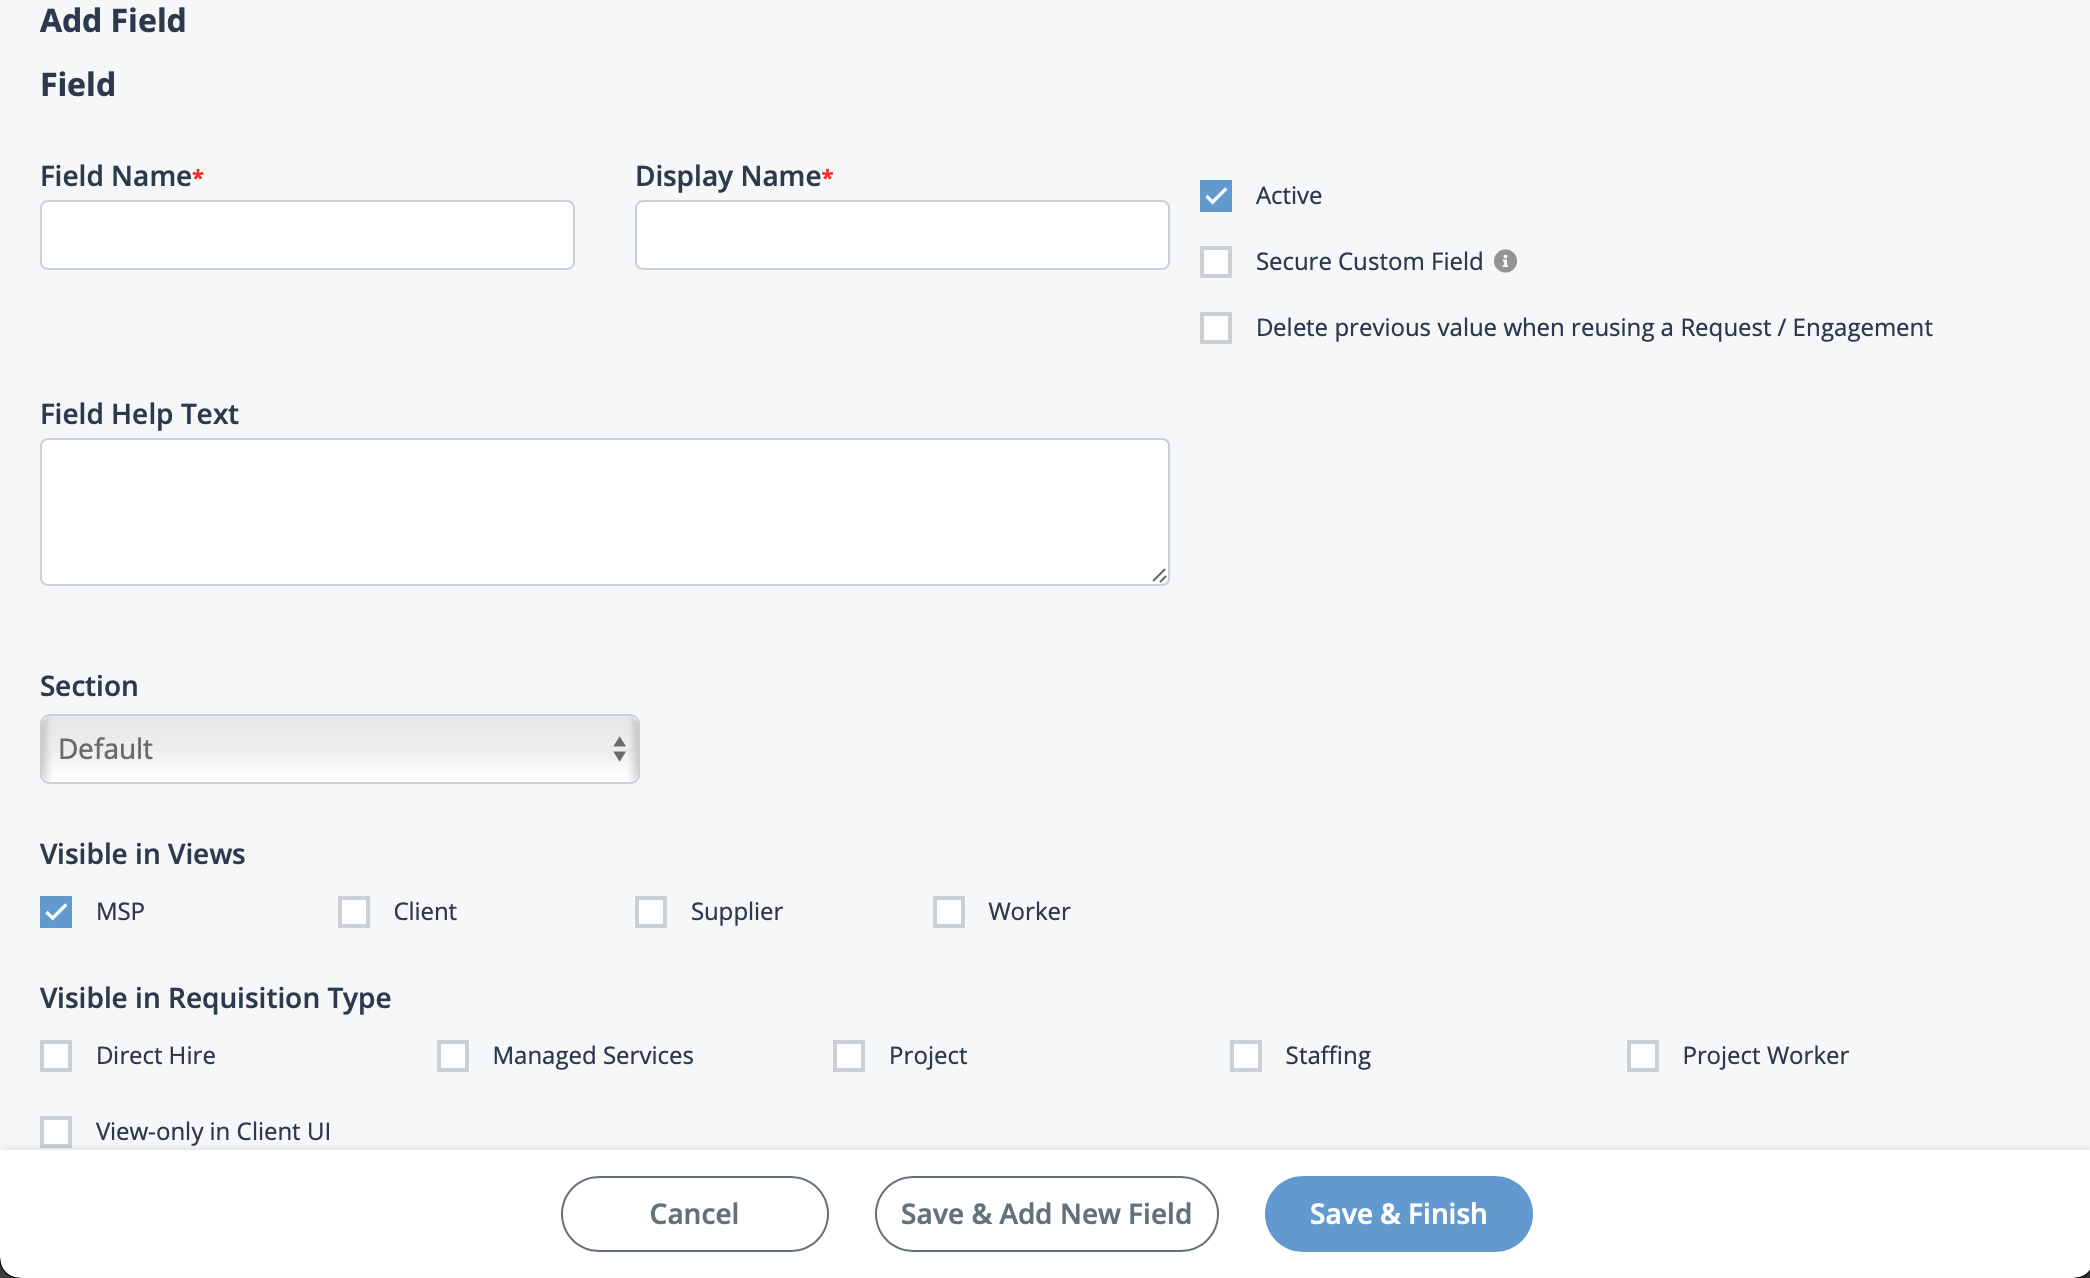
- Enter the Field Name.
- Enter the Display Name. This name appears in the application.
- Select Active to enable the field in the application.
-
If you are configuring a custom field for a Requisition
or a Worker workflow, you can optionally select the
Secure Custom Field check box. This setting encrypts
the value in the user interface. For more information about this field, see
Secure Custom Fields.
Note:If an MSP has the 'View Sensitive Data' permission on their account, the MSP can view the decrypted value for a Worker custom field in the candidate information (). For more information about this permission, see MSP User Permissions.Note:The BYOK Encrypted option (if BYOK is enabled) is automatically selected when the Secure Custom Field option is enabled. See step 9.
-
If you are configuring a custom field for a Requisition
or a Worker workflow, and the BYOK feature is enabled,
you can optionally select the BYOK Encrypted check box.
This setting encrypts the value in the database. The BYOK feature is enabled in
the client organization's Security configuration. See Bring Your Own Key Encryption.
Note:If the Secure Custom Field option is enabled, this option is additionally enabled and cannot be disabled.
-
Enter the Field Help Text.
Tip:This information is optional, and can give context for the field.
- From the Section drop down, select the section where the field appears.
-
In the Visible in Views section, select the check boxes
for the workflow views to add the custom fields to.
Note:If you are adding a custom field for the Project Worker engagement, you must select either 'Project Worker Details' or 'Change Status' from the Section drop down. No other selections are valid for this requisition type.
-
In the Visible in Requisition Type section, select where
the custom field is visible, as follows:
Option Description Managed Services Displays for managed services requisitions. See Managed Services Requests. Staffing Displays for staffing requisitions. See Staffing Requests. Project Displays for project (SOW) requisitions. See Project Engagements in the Application. Project Worker Displays for project worker engagements. See Project Worker Engagements. View-only in Client UI Displays in the Manager view as read-only fields. Display on Worker Home in Time & Expense Bin Displays on the Home page of the Worker view. See Home Page. - Depending on your business use case, select details for your custom field. For more information on available options by workflow type, see Custom Fields Options by Workflow.
- In the Visible on Request / Engagement section, select which area of a staffing or payroll requisition (or both) to display the custom field on.
-
Select
 to add the new custom field and close the editor.
If you are adding additional custom fields, select
to add the new custom field and close the editor.
If you are adding additional custom fields, select  .
.